This post may contain affiliate links. See my disclosure policy for more details.
Sponsored by Cricut
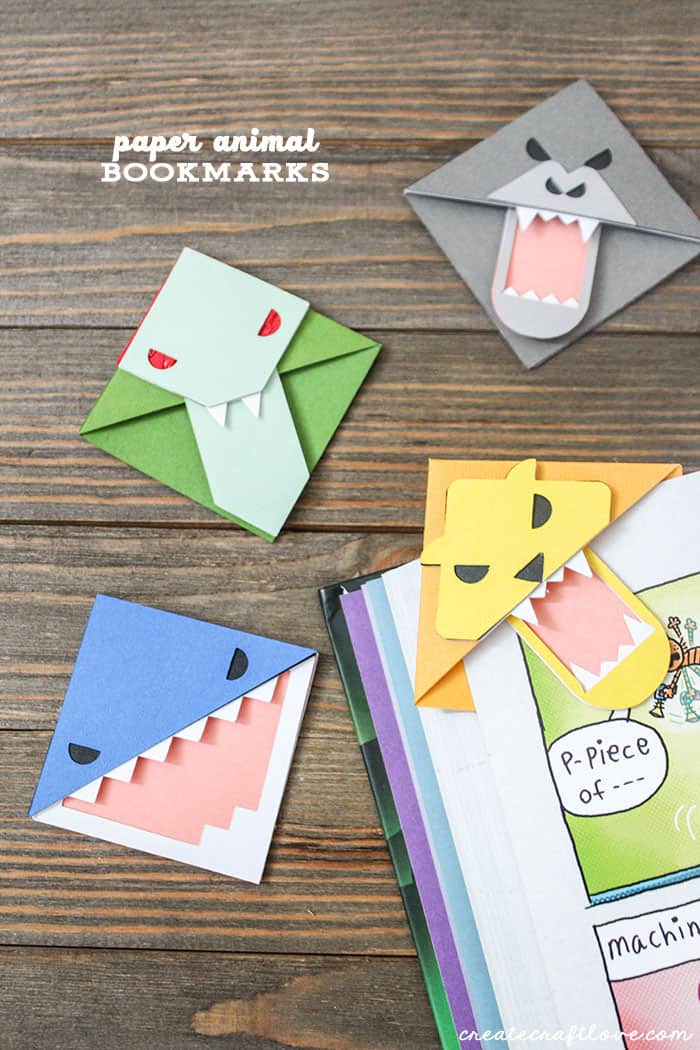
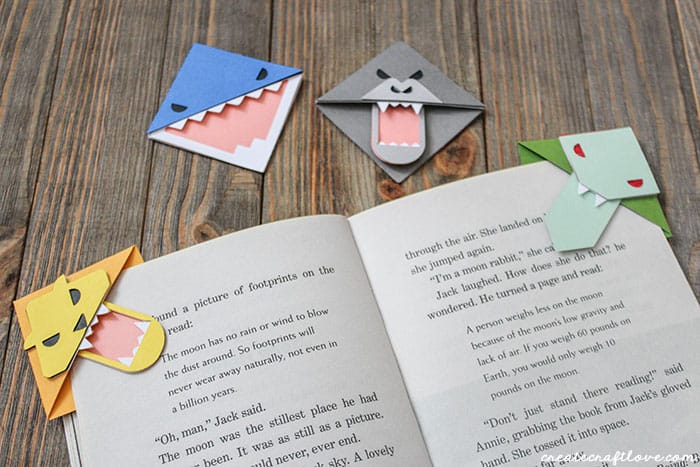
Get your kids excited about reading with these Paper Animal Bookmarks using the Cricut Scoring Wheel!
If you were here last week, you saw that Cricut released a new tool for their Adaptive Tool System called the Cricut Scoring Wheel! This tool is only available for the Cricut Maker because it contains the drive mechanism for this tool system.
Scoring Wheels can use up to 10X the pressure possible with the Scoring Stylus, allowing you to make more crease-and-fold projects than ever
with ease, including breathtaking wearable art, 3D home decor, sculptures, and more, with ease.
This post contains affiliate links for your convenience.
Materials needed for Paper Animal Bookmarks
- Cricut Maker
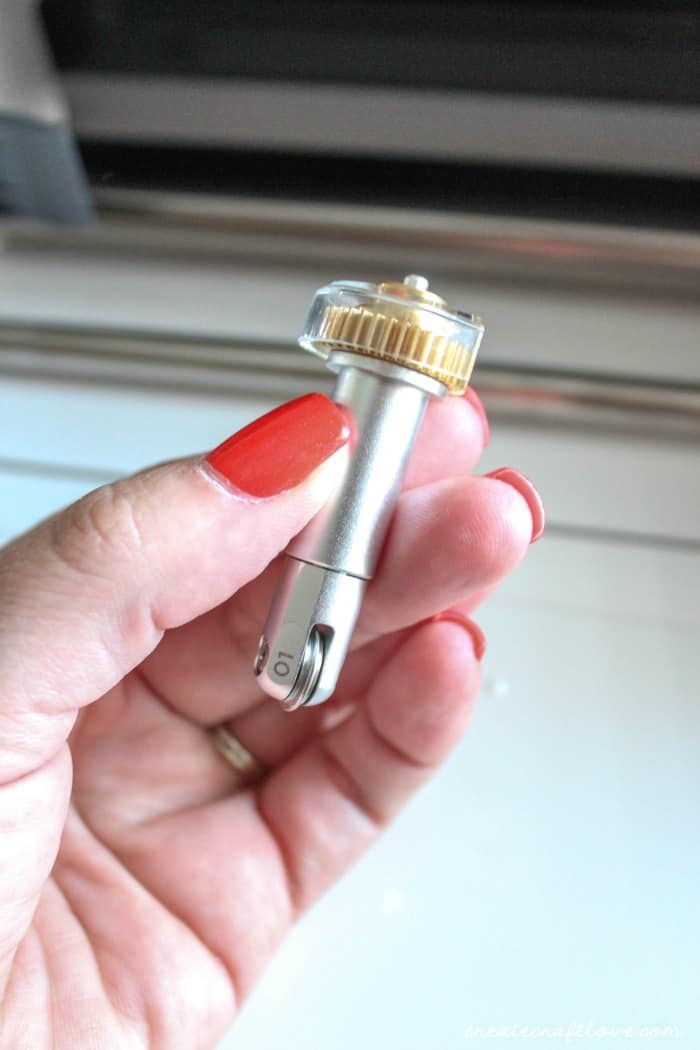
- Cricut scoring wheel
- Fine point blade
- Jewel Cardstock Sampler 12×12
- Sorbet Cardstock Sampler 12×12
- Basic Cardstock Sampler 12×12
- Light Grip Mat 12×12
- Hot glue gun
For this project, I used the following Design Space images:
- Snake Book Corner #M456F5
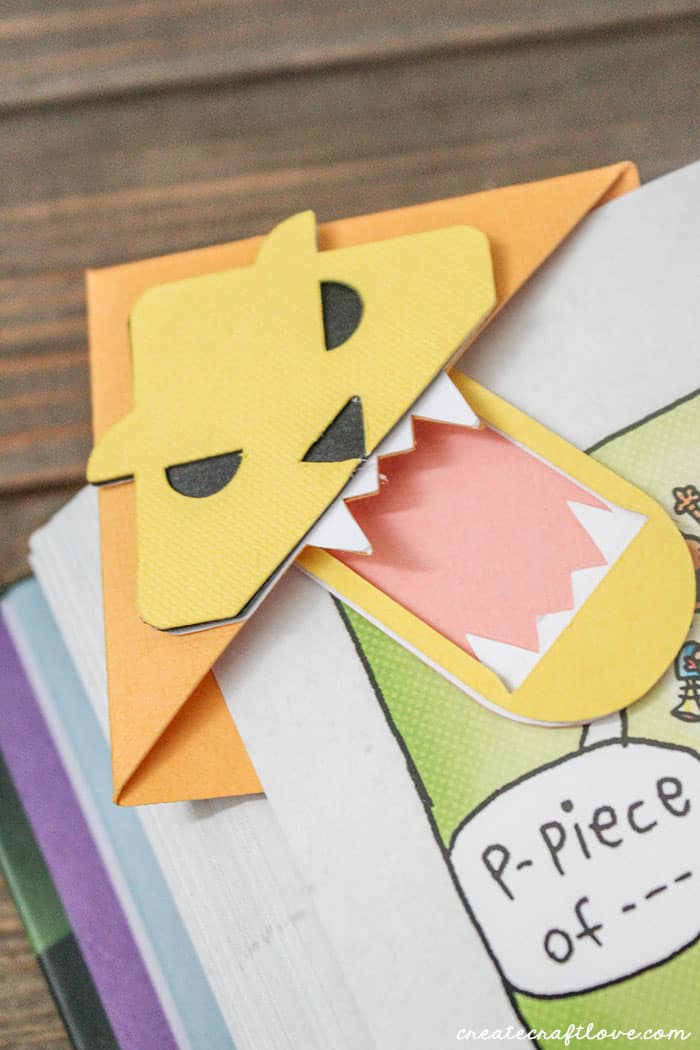
- Lion Book Corner #M406D8
- Shark Book Corner #M44C3B
- Gorilla Book Corner #M45EE6
I opened those images, one at a time, in Design Space. There is no need to re-size them. Pick the colors of paper you wish to use and proceed to the cut screen. (These cardstock packs are by no means the only colors you can use. Those just happen to be the packs I had at home.)
Since there are scoring lines included in the design, Design Space will prompt you which scoring wheel to use. This will depend on the material you pick. We are working with card stock therefore the software will suggest the single scoring wheel. You can tell by the number on the side of the wheel. The single wheel is designated as 01. Design Space will let you know when to place it in the machine based on the cut layers. The single wheel creates a single crease on the cardstock. It is perfect for use with thin papers to cardstock.
Look at those beautiful creases!
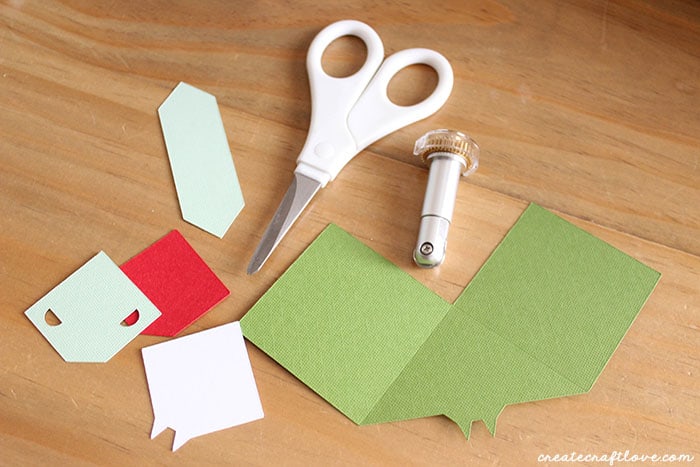
Fold the large piece along the crease lines and secure with the hot glue gun.
Assembling the Paper Animal Bookmarks
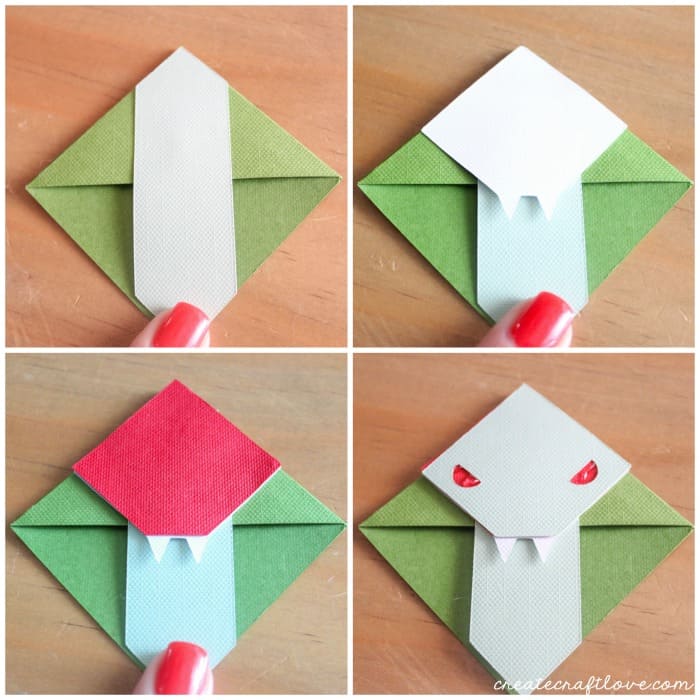
Once your large piece is folded and glued into a diamond, add the long light green piece in the center of the diamond and glue in place.
Next add the white piece with the fangs and glue.
The red piece that will be seen for the snake eyes is next.
Finally add the smaller light green piece with the eye holes. Glue in place. Be careful not to glue under the eye holes like I did. (Blogger fail.)
I made several of these for my kiddo and I can tell you that using the scoring wheel even on this simple project saved me a ton of time. Usually, I would have to use a ruler and exact a crease prior to folding. This usually results in me cussing at the paper because I cannot get the fold exact. But the scoring wheel changes all that!
Reed loves them! And I have to admit, they are pretty stinkin’ cute.

This is a sponsored conversation written by me on behalf of Cricut. The opinions and text are all mine.
