This post may contain affiliate links. See my disclosure policy for more details.
Hi all!
I’m Sarah, the creative genius behind Becoming Martha. I’m a mama to two girls, ages 5 and 10, an elementary school teacher, and a self proclaimed glitter addict. My blog is full of fun kids activities and crafts, easy DIYs for your home, and lots and lots of parties!
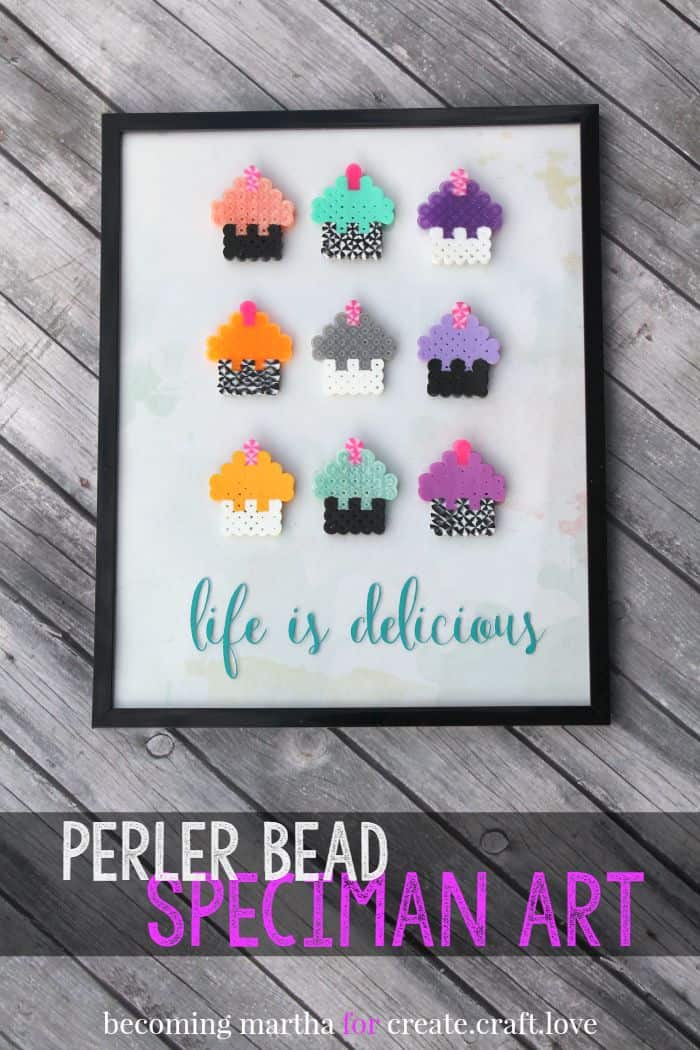
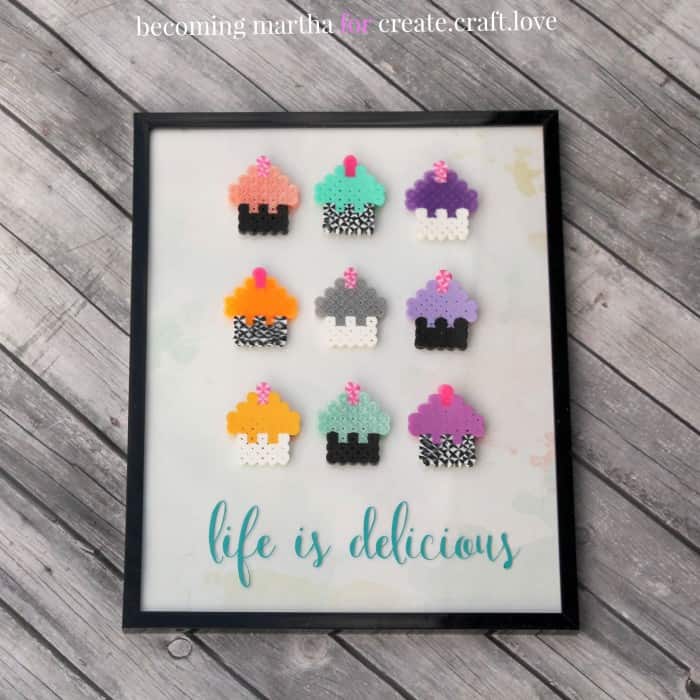
Today, I’m sharing a fun project that I created with my oldest daughter. She is a huge perler bead fan, which took over after the Rainbow Loom rage settled down. We made it for her room, in the same color scheme as her bedding and curtains – purple, orange, and mint green.
Want to make your own perler bead art? Here’s what you’ll need:
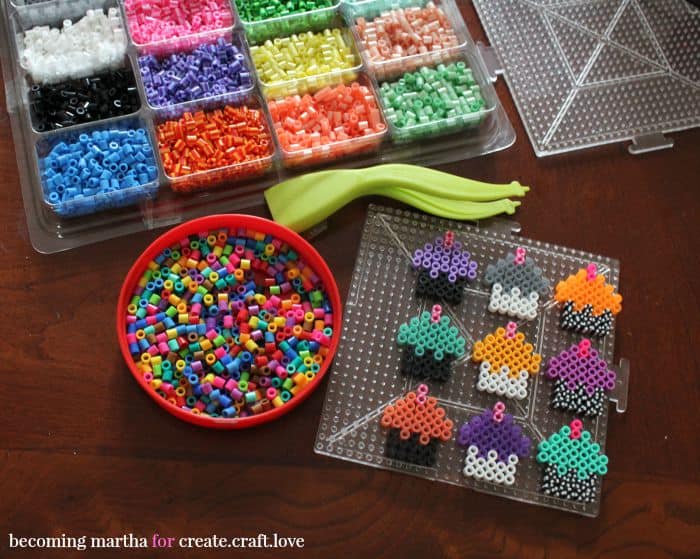
- perler beads
- square perler pegboard
- iron
- perler ironing paper (parchment paper)
- frame
- scrapbook paper
- double sided tape or glue gun
- vinyl quote
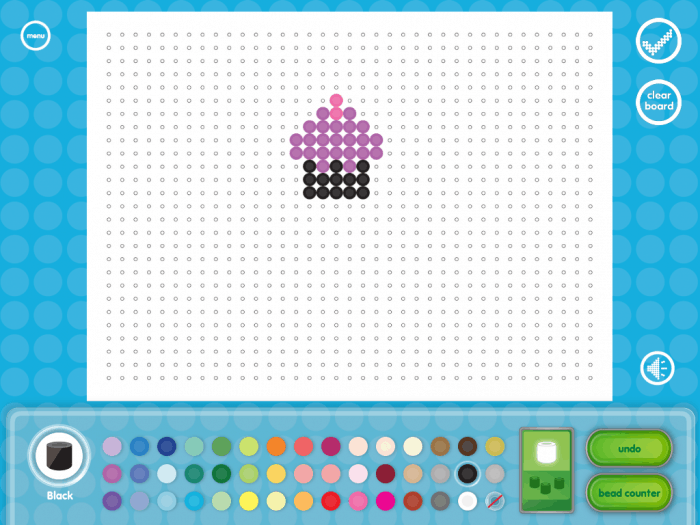
- perler iPad app (optional)
(If you want to order any of the items online, head over to my blog for a source list.)
So, let’s take a second and talk about this really cool app that I found while doing this project. I was looking for a blank perler template to share with you, and came across this app. It has so many patterns to choose from, and a blank template to create your own design. It’s really helpful to see your design before placing all those beads. (You can also get a pegboard that sits right on top of the ipad, which makes transferring the designs a breeze!)
Once you have decided on the design and color, start placing your beads on the board. I use these perler tweezers to help with placement of the beads. My board was big enough to fit all nine cupcakes on one board, but you can use a smaller board as well and just rotate through the designs, ironing as you go.
Follow the instructions for ironing, and then start assembling your frame. Place the scrapbook paper inside the frame, and then adhere the cupcakes to the front of the glass using the tape or glue. Place the vinyl quote down below. I cut mine using my Cricut Explore and some teal vinyl.
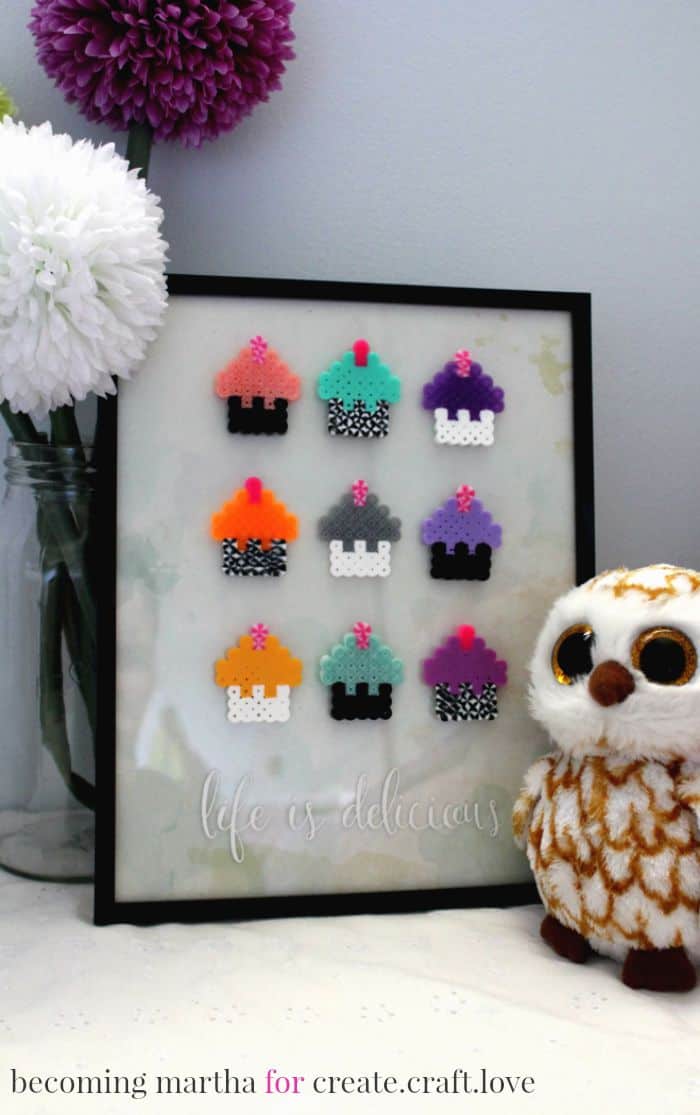
I did it with white vinyl as well, which we loved but was harder to see in the picture. My daughter has it on her bedside table, next to one of her many, MANY owls.
Fun, right?! We have a ball creating these little perler creations, and they are cute to use as art, keychains, and so much more.
Want more great ideas that you can create with your kids? Here are some of our favourite products and projects – just click the image to be taken directly to the post!

Hope you enjoyed my first post over here – and I can’t wait to share another fun idea with you next month!
