This post may contain affiliate links. See my disclosure policy for more details.
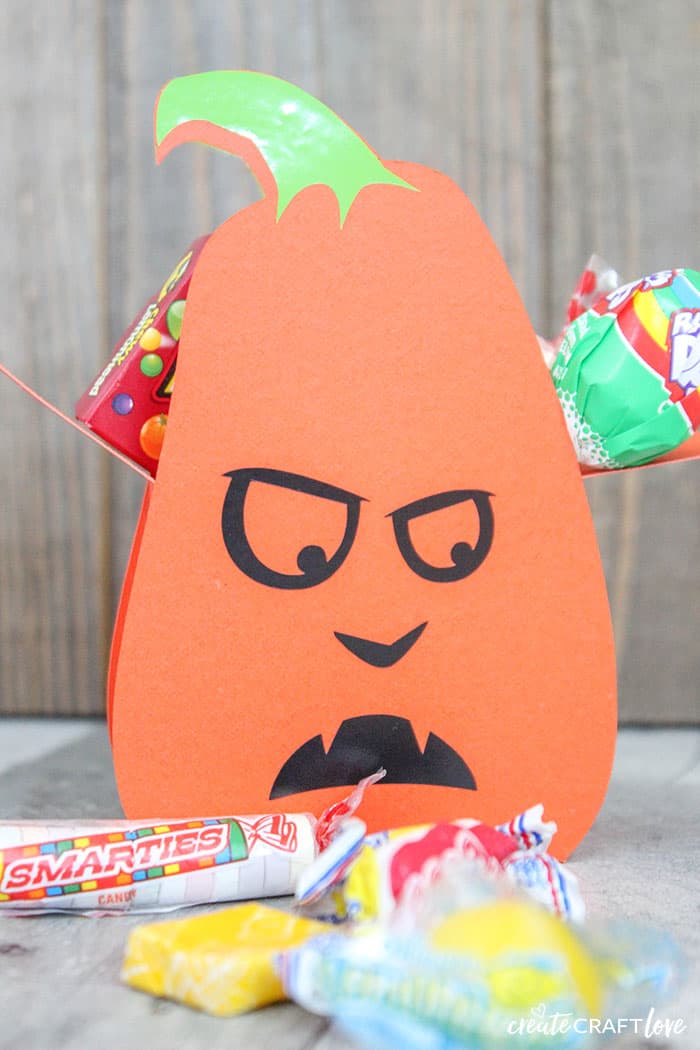
Pass out these adorable candy filled Paper Pumpkin Treat Boxes to your trick-or-treaters this year!

Paper crafts are so much fun to make for the holidays! These treat boxes are adorable. You can also add straw toppers to your party decor!
This post contains affiliate links for your convenience!
Materials needed to make Paper Pumpkin Treat Boxes
Cricut Maker or Explore
Fine point blade
Single scoring wheel
Light Grip Mat
Orange cardstock
Black adhesive vinyl
Green adhesive vinyl
Transfer tape
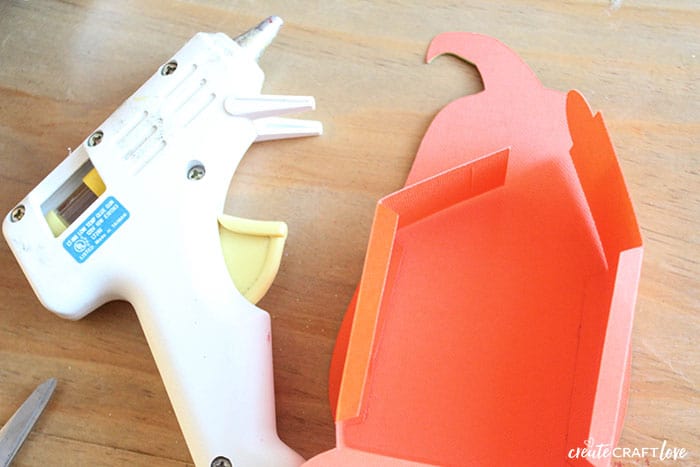
Hot glue gun
CANDY, CANDY, CANDY
Images used for paper pumpkin treat boxes:
Pumpkin Box #M36692
Pumpkin Box #M3B1B6
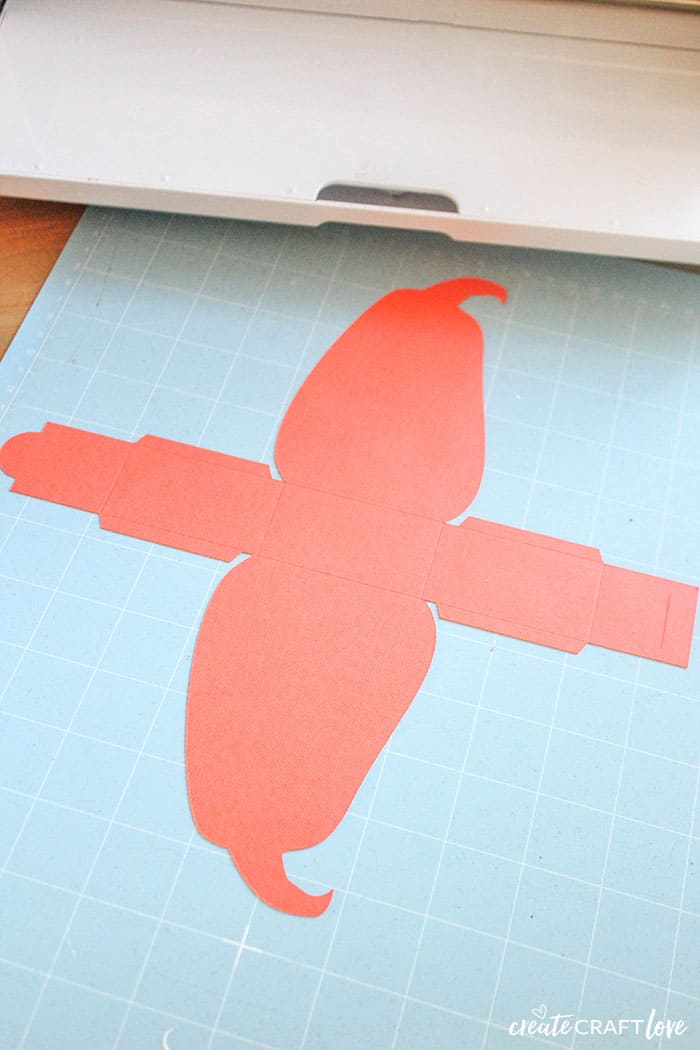
Open these images in Design Space and size accordingly. Place orange cardstock on light grip mat. The software will prompt you to place the scoring wheel in the adaptive tool system. Proceed with scoring. Once scoring complete, the software will prompt you to change to the fine point blade. Complete the cut and carefully remove from light grip mat.
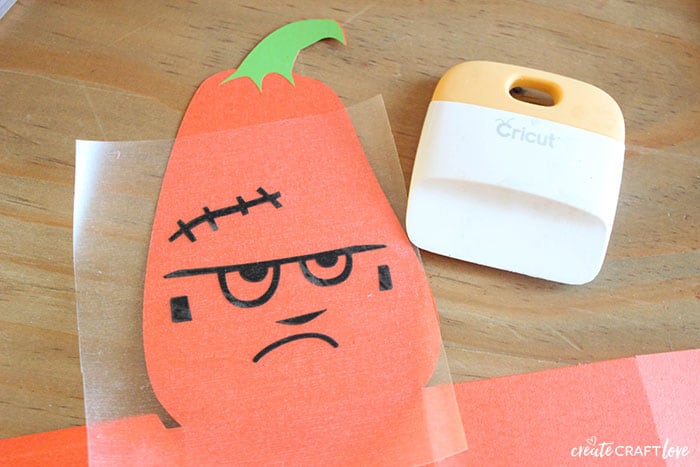
Follow the prompts to cut the stem and jack o lantern faces out of adhesive vinyl. The adhesive vinyl is easier to apply and you don’t have to mess with the tiny face pieces.
Weed out the excess vinyl and apply the stems to the outside of the box. Next, used transfer tape to apply the jack o lantern faces.
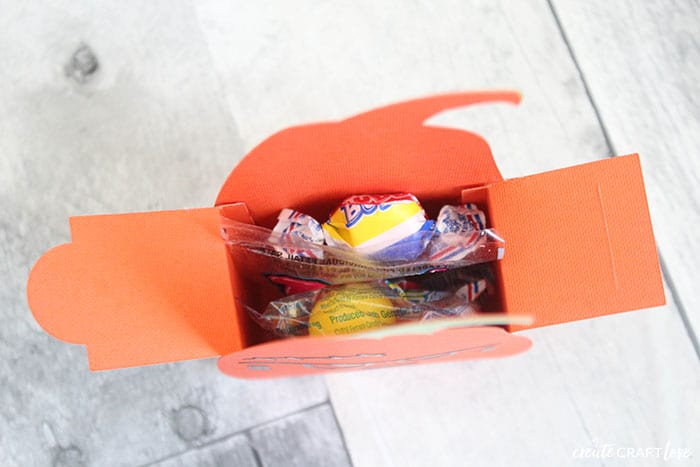
Fold along the score lines. Fold the center part of the box and attach at the top before gluing in place. Hot glue the edges together.
Finally, fill with candy to pass out to the little ghosts and goblins!
These are super cute! I love passing out something unique to the kids. This would also be great for classroom Halloween parties! (We usually have around 200 trick-or-treaters so I will not be handing these out at the door…LOL)
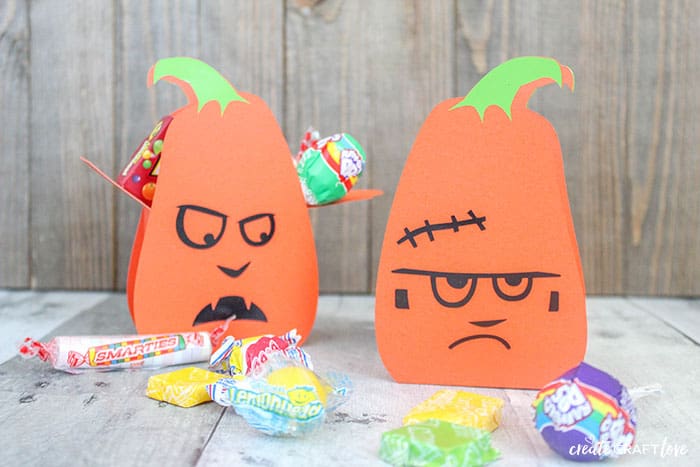
If you’ve got mad Design Space skills, you can find other pumpkin faces to use! I chose to go with the ones on the boxes to make the tutorial simpler.