This post may contain affiliate links. See my disclosure policy for more details.
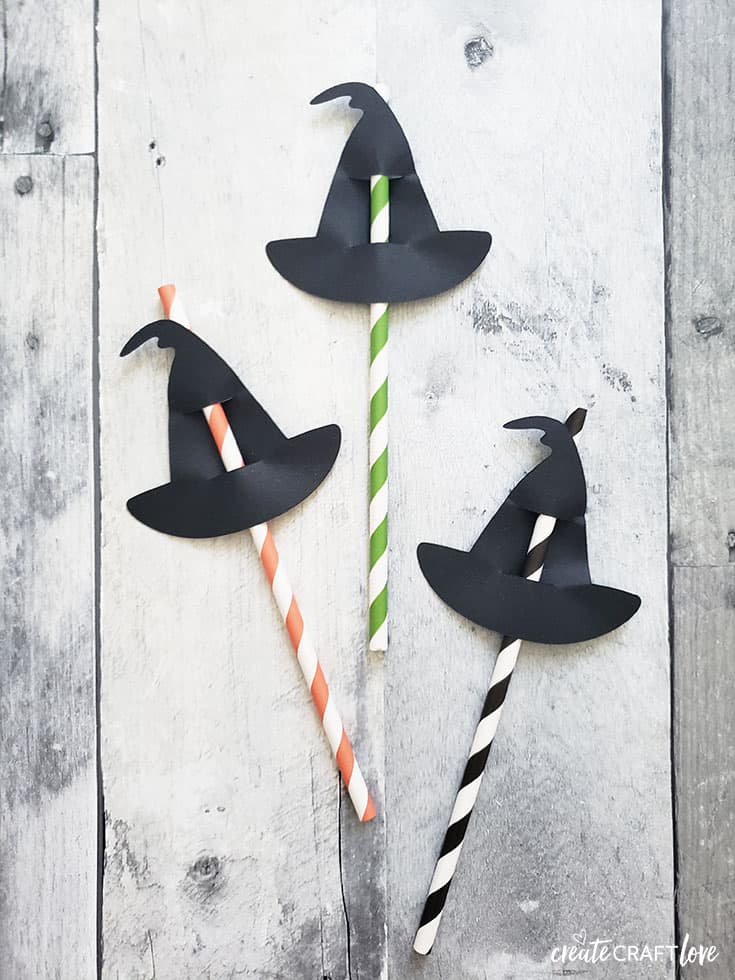
These Witch Hat Straw Toppers are a fun way to jazz up your Halloween party decor!

Straw toppers are a fun way to add to any party! I love this trick!
This post contains affiliate links for your convenience.
Materials needed for Witch Hat Straw Toppers
Cricut Maker or Explore
Light grip mat 12×12
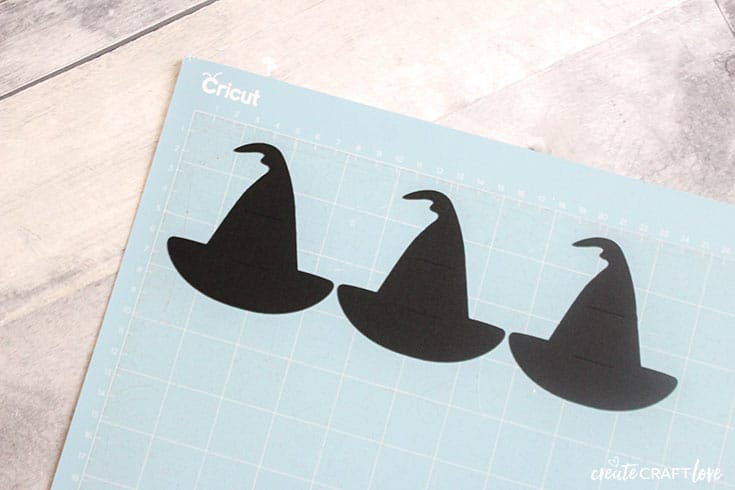
Black cardstock paper
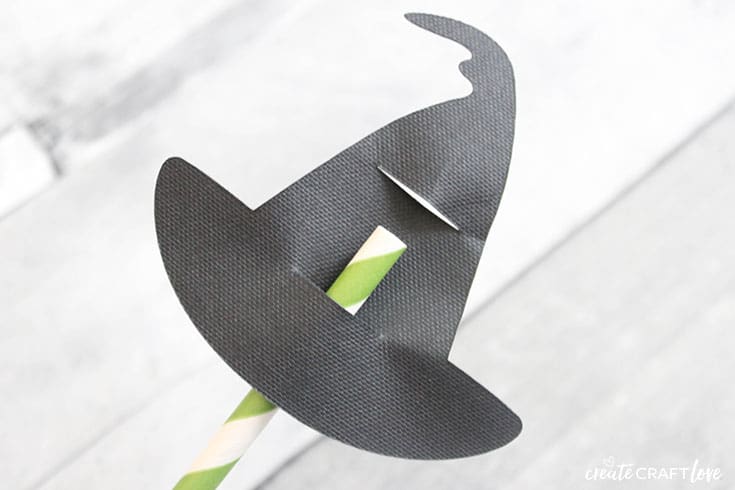
Paper straws
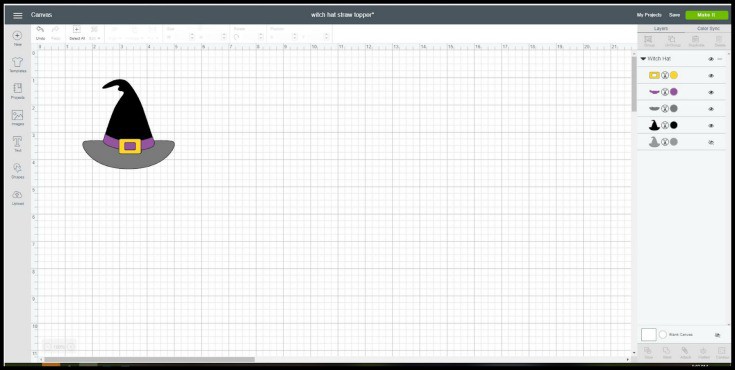
Images used from Design Space Library:
Witch hat #M36961
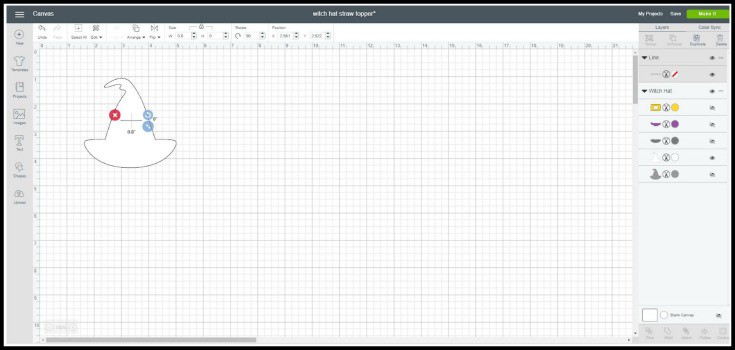
Open the above image. It will display on your canvas. Resize to 3.1 inch height.
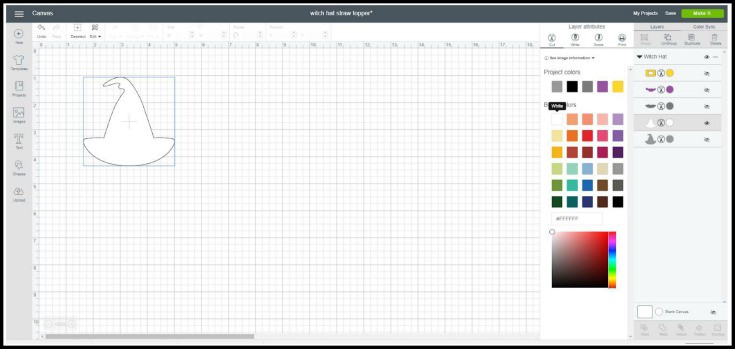
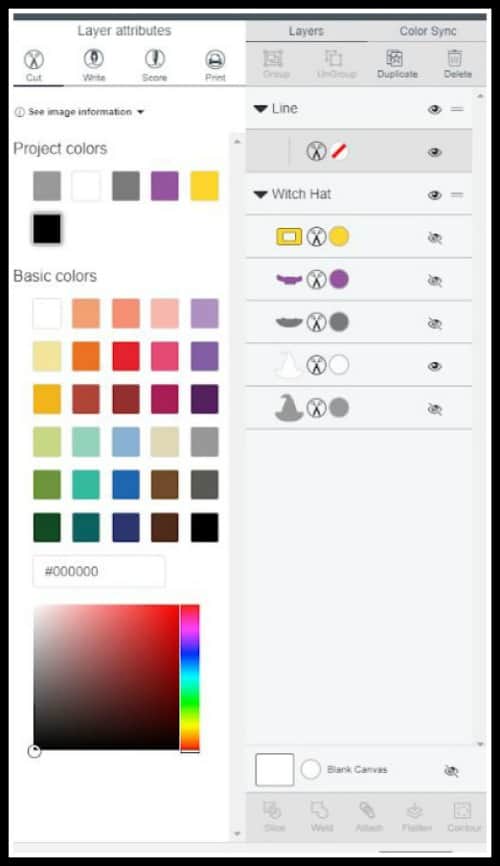
In the layer box to the right, block all of the layers except the black hat layer by clicking the eyeball next to the layer.
Click on the black circle next the the black hat in the layer box and change the color to white so you can see what you are doing.
Click “shapes” on the left hand menu. Click the scoring line shape. (Don’t worry, we are going to change it to a cut line.)
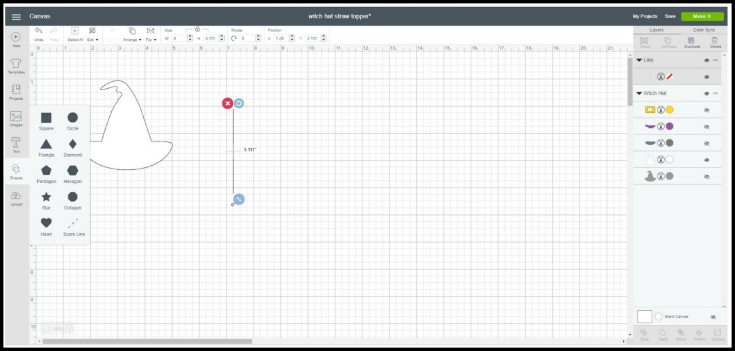
Go back to the layer box on the right. The line is at the top. Click the pen to the left of the red line. This will bring up that layer attributes box. Click on “cut”. You have now changed the scoring line to a cut line!
Now we need to resize the line and rotate it to a horizontal orientation. Click the line and then on the top menu bar, type in 0.8. In that same menu bar, type 90 in the the rotate box and click enter. Move the line to the upper third of the witch hat.
Right click on the line. This will bring up a drop menu. Click “duplicate”.
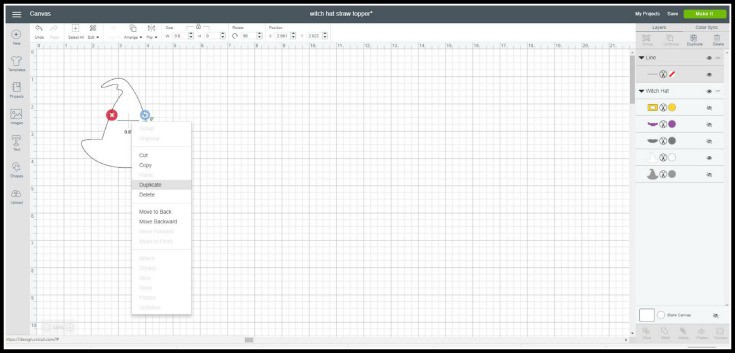
Move the duplicated line directly below the other line to the lower third of the hat.
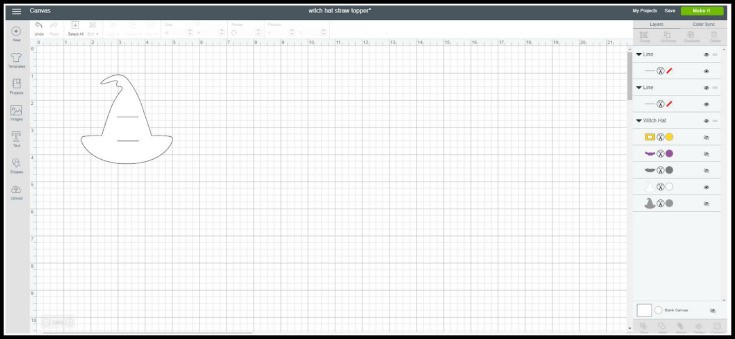
You’re set to cut your witch hat straw toppers!
Time to cut and assemble
Make multiple copies of the witch hat and send to cut.
Insert the paper straw from the back of the witch hat through the lower hole. Weave through and push the straw through the front to the back of the top hole of the witch hat.
These are perfect for classroom Halloween parties!