• Home
  • Crafts
    • Wreaths
    • Back to School Crafts
    • Christmas Crafts
    • Father’s Day Crafts
    • Fourth of July Crafts
    • Halloween Crafts
    • Kid’s Projects
    • Mother’s Day Crafts
    • Thanksgiving Crafts
    • Valentine’s Day Crafts
  • Recipes
    • Christmas Recipes
    • Fourth of July Recipes
    • Halloween Recipes
    • Thanksgiving Recipes
    • Appetizers
    • Beverages
    • Breakfast
    • Dessert
    • Main Dish
    • Side Dish
    • Soups & Salads
    • Snacks
  • Freebies
    • Back to School Printables
    • Christmas Printables
    • Father’s Day Printables
    • Fourth of July Printables
    • Halloween Printables
    • Mother’s Day Printables
    • Thanksgiving Printables
    • Valentine’s Day Printables
  • xTool
  • About
    • About CCL
    • Privacy Policy
    • Disclosure
    • Contact Us
    • Email
    • Facebook
    • Instagram
    • Pinterest
    • RSS
    • Twitter

Create Craft Love

September 10, 2025 ·

Vintage Window Repurpose: Halloween Window Decoration

Halloween Decor

  • Facebook
  • Twitter

This post may contain affiliate links. See my disclosure policy for more details.
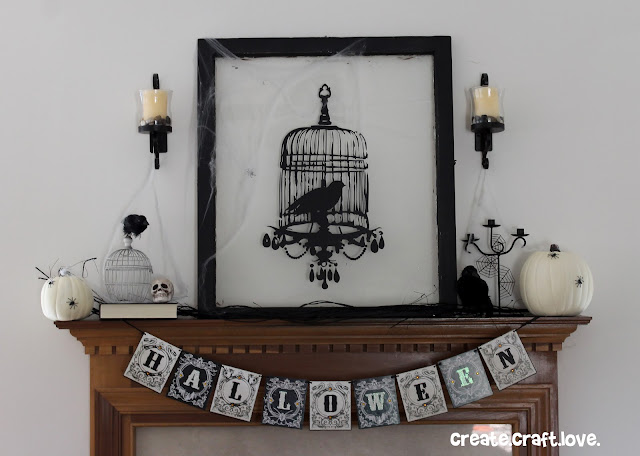
  Like I mentioned yesterday, I found this antique window at a garage sale at the end of July. For $4 – it was a steal! I had been imagining a Raven themed mantel and this would be perfect! 
This Halloween Window Decoration decoration is the centerpiece of my mantelscape and I love that it was the perfect way to do a vintage window repurpose, something I’ve wanted to do for a long time!
 

Halloween Window Decoration Inspired by The Raven

Vintage Window Repurpose: Halloween Window Decoration

My first plan was to have the window horizontal with a murder of ravens flying across it. 
{Did you know that a flock of ravens is called a murder of ravens? Makes it even spookier, right?}
Well, I could not find any raven images that I liked.Then I came across this one of the raven in the ornate, antique bird cage. I consulted with a few bloggy friends who assured me this was the way to go.
 
My little window was in some rough shape and needed a little love. When I brought it home, it was an olive green color. I began sanding and chipping away to discover five layers of paint! That’s when I enlisted the husband’s help. Now keep in mind, Kyle does NOT usually help with my crafting. But give him a chance to use a power tool and he’s there.


Thirty minutes later, he had made his way to the original wood layer.


I taped off the inside of the window so that I wouldn’t get the glass all messy when I began painting.


I’ve been wanting to try the Annie Sloan Chalk Paint forever, and this was the perfect opportunity!


To antique and distress the window, I used a technique that Jamielyn from I Heart Nap Time used on her blog – vasoline.  {To see the full tutorial – click here.}


I coated the inner and outer edges with the vasoline.  I also used some over the areas where there was old paint left over.
Let the painting (and drying) commence!


The great thing about it was it really one took one coat of paint!  Perfect for someone as inpatient as me!
 
While it was drying, I went inside, fired up the Cameo and got to work on the vinyl birdcage cutout.  The dimensions of the window are 31.5 inches by 37.5 inches.  Knowing that, I blew up the image to roughly 15.5 inches by 25 inches.  Since, the Cameo will only cut what is in the grid, I had to keep moving the image around to get it cut out correctly.  Make sure your vinyl sections kind of overlap as you are cutting it out so you know where to place them when we get to that part.


Six sections and almost eight feet of vinyl later, and it was all cut out.
The next morning, I distressed the edges.  I used a grit sanding paper and it came off without fuss.


After slowly and painstakingly removing the extra vinyl, I was ready to being piecing the birdcage together on the window.


To center it, I had to use my mad math skillz.  =)  31.5 inches in half is approximately 15.5 inches.  I measured 15.5 inches in.  The total height of the birdcage is 25 inches (subtract from 37.5 inches) and you are left with 12.5 inches.  Divide 12.5 inches in half which is 6 (and something) inches.  I measured 6 inches down from the halfway point.  Make sense?


Mark with a piece of painter’s tape.
Begin applying the vinyl.  I started at the top since the top of the bird cage made a great landmark.


Using your standard transfer paper, apply the section of vinyl to the window.  Rub firmly.


Slowly remove the transfer paper to reveal your vinyl. And that was all the further I got.
What?
Well, as I was applying the second piece of vinyl, I was leaning over the window (knee on the window but not my weight) to balance. I leaned back on my foot and it WENT THROUGH THE WINDOW!  (Thankfully the window was just cracked and remained intact.)
My project had to take a quick intermission as I went to the ER to have stitches.
 
Three hours, four stitches and a tetanus shot later I was back home. 
Granted, most people would have called it a day. But I was not going to let that window get the best of me.I finished it but I didn’t take anymore project pictures because I was so mad.
As you lay the rest vinyl, be careful with the overlapping.
I had to stop and trim some sections because of how “open” the image is.
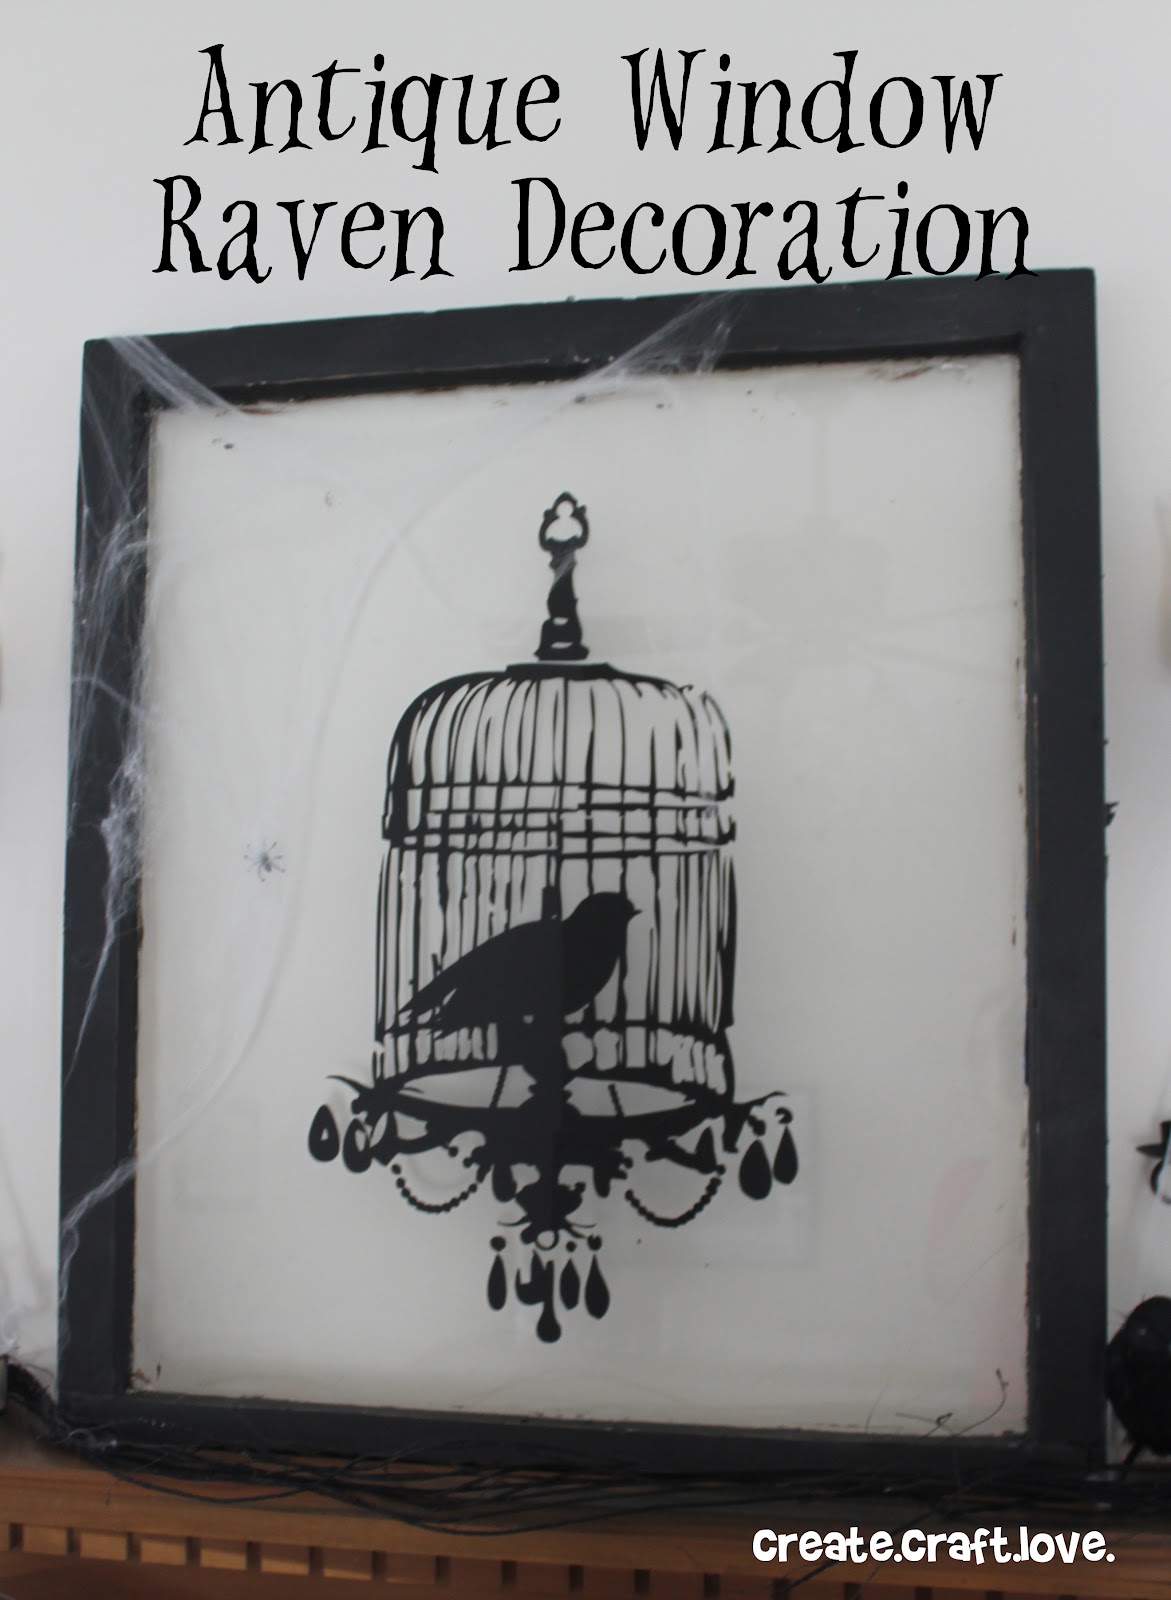
Here was the end result after I finished that evening. 
If you look carefully where the arrow is pointing, you can see the crack in the glass.


That is why this was a labor of love and pain.  But I can say that I am totally in love with it now!

 
{If you made it all the way through this post, you should get an award.}
What do you think?  Isn’t this Halloween Window Decoration amazing?!
I can’t wait to reuse this window, again and again!!
And of course, we’ve got more wonderful Halloween decor ideas where this came from, here are more of my personal favorites: 

  • Farmhouse Ghost Topiary
  • Halloween Silhouette Lanterns

  • Halloween Owl Wreath | How To

  • Halloween Mummy Candle Holder

  • How to Make a Candy Wreath


About Us

We are passionate about sharing simple, fun DIY projects that anyone can tackle—whether you're a seasoned crafter or just getting started. From seasonal décor to everyday crafts, we love inspiring others to make something beautiful with their own two hands.

« How to Make Delicious Apple Cider Cups
Eucalyptus Spearmint Bath Salts »

Trackbacks

  1. Faux Mercury Glass Ornament says:
    December 17, 2012 at

    […] since the foot going through the glass stitches incident {you can read about that here}, I am not allowed to use power tools.  {Or any tools for that matter..LOL}  So I enlisted the […]

    Reply
  2. Power Tool Safety says:
    May 21, 2013 at

    […] to try something other than my glue gun on a project, he reminds me of my foot going through my Antique Window Raven Decoration.  {If you don’t know about that, you can read about it here.}  It was a bloody mess […]

    Reply
  3. Go black and white this Halloween: 7 irresistible DIY decor ideas | Homediy Pro says:
    September 23, 2014 at

    […] Get a how-to during Create. Craft. Love. […]

    Reply

Popular Posts

Winter Decorations for After Christmas
This Gold Leaf Mason Jar Vase is keeping with the trends this spring! #spring #gold #goldleaf #masonjars

HALLOWEEN

These Pumpkin Spice Cupcakes are everything fall is meant to be! via createcraftlove.com

THANKSGIVING

Create these Gold Pumpkin Votives for your Thanksgiving dinner table! via createcraftlove.com for @the36thavenue
The ULTIMATE Guide to Thanksgiving Printables via createcraftlove.com

CHRISTMAS

This Gift Guide for the Geek will leave them AND your pocketbook smiling! via createcraftlove.com
Winter Wreath Workshop Round Up at createcraftlove.com
This Chalky Finish Christmas Frame is the perfect last minute handmade gift idea and I included a FREE printable! via createcraftlove.com
© 2019 · Create Craft Love·
  • Pinterest
  • Facebook
  • Twitter