• Home
  • Crafts
    • Wreaths
    • Back to School Crafts
    • Christmas Crafts
    • Father’s Day Crafts
    • Fourth of July Crafts
    • Halloween Crafts
    • Kid’s Projects
    • Mother’s Day Crafts
    • Thanksgiving Crafts
    • Valentine’s Day Crafts
  • Recipes
    • Christmas Recipes
    • Fourth of July Recipes
    • Halloween Recipes
    • Thanksgiving Recipes
    • Appetizers
    • Beverages
    • Breakfast
    • Dessert
    • Main Dish
    • Side Dish
    • Soups & Salads
    • Snacks
  • Freebies
    • Back to School Printables
    • Christmas Printables
    • Father’s Day Printables
    • Fourth of July Printables
    • Halloween Printables
    • Mother’s Day Printables
    • Thanksgiving Printables
    • Valentine’s Day Printables
  • xTool
  • About
    • About CCL
    • Privacy Policy
    • Disclosure
    • Contact Us
    • Email
    • Facebook
    • Instagram
    • Pinterest
    • RSS
    • Twitter

Create Craft Love

April 10, 2019 ·

How to Upload Images into Cricut Design Space

Cricut Projects

  • Facebook
  • Twitter

This post may contain affiliate links. See my disclosure policy for more details.

If you’re new to Cricut, you will want to bookmark this How to Upload Images into Cricut Design Space!
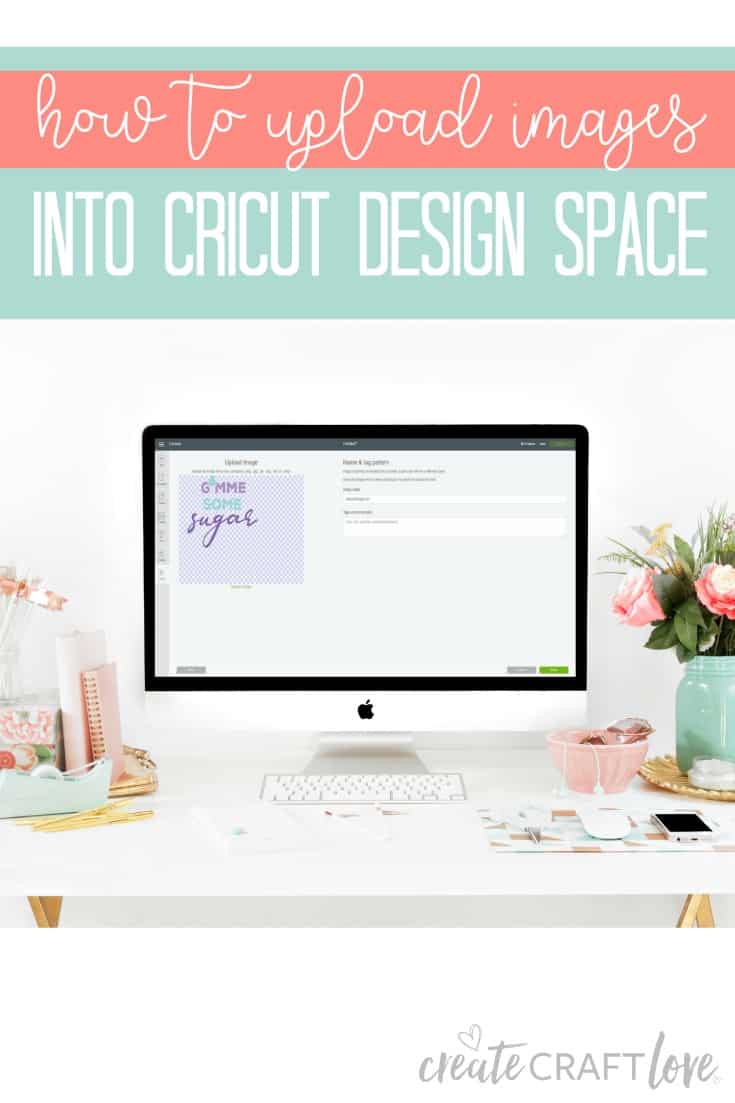
How to Upload Images into Cricut Design Space #cricut #designspace

Have you ever wondered how to use all of those cute files offered on multiple different sites?  I offer a lot of free cut files on the blog.  This tutorial will walk you through uploading your own images or images you have downloaded/purchased into Cricut Design Space.

Cricut Design Space allows you to upload JPG, PNG, SVG, DXF, BMP, or GIF files.  Most blogs or design sites offer multiple different file upload options.  Typically, I offer JPG, PNG, and SVG because they are the most popular.  JPG and PNG files are ideal for simple images.  SVG files are usually for multi-layered images.  Learning this simple technique will open up an entire world of design that you can obtain outside of the Cricut software.

How to Upload Images into Cricut Design Space

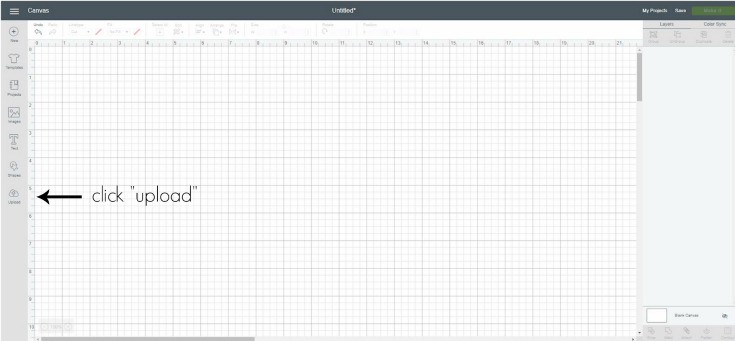
Open your canvas in Design Space.  In the left hand toolbar, at the bottom, click “upload”.  This action will take you into the image upload library.
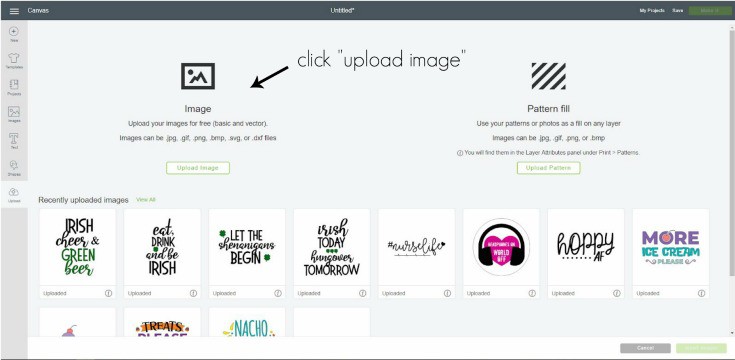
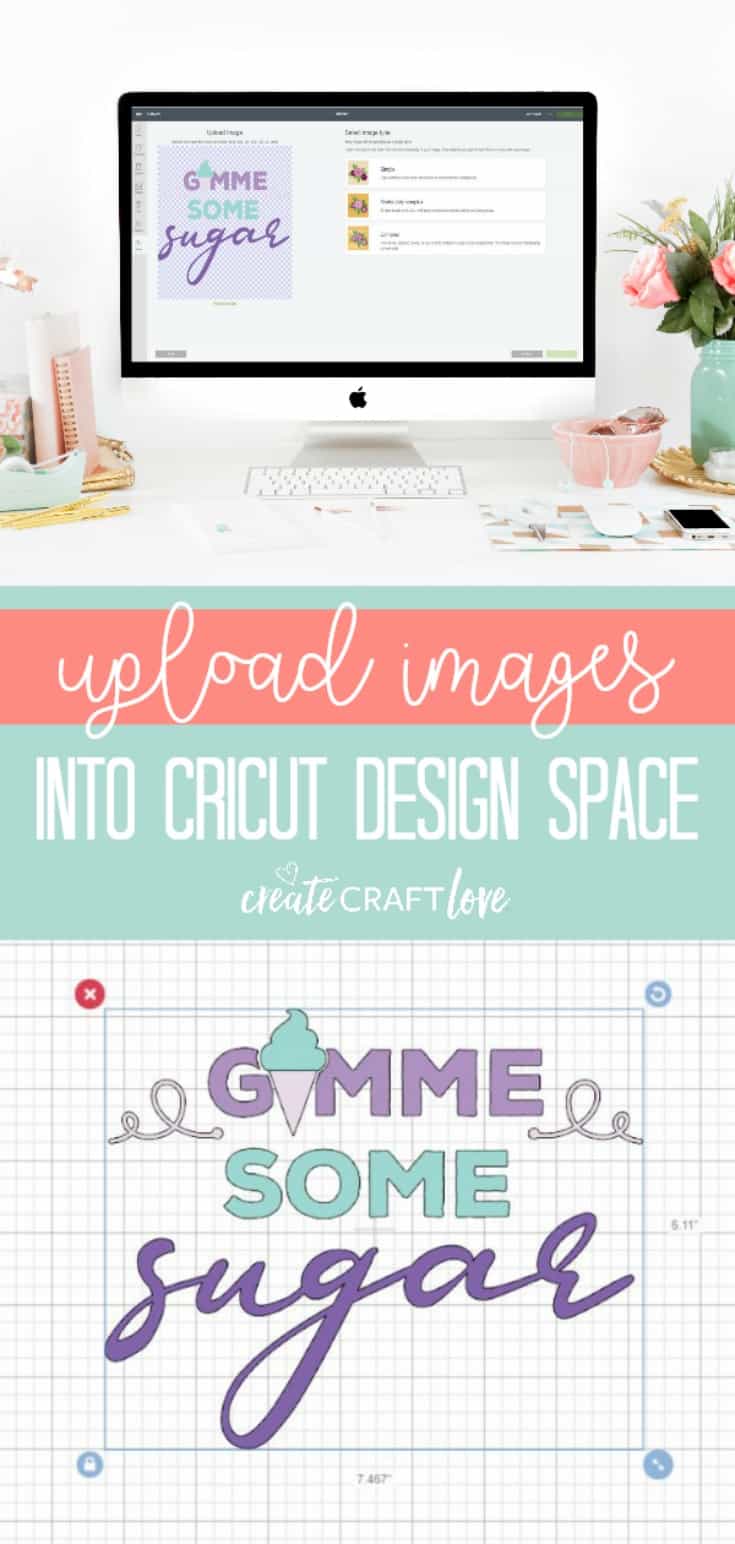
In this new window, click the green “upload image” button.  A new window will appear, click browse.  Select the image you wish to use for your project.
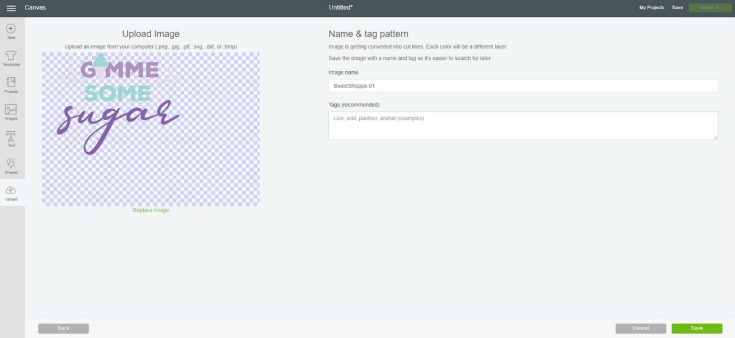
Your selected image will appear.  Click “save” in bottom right hand corner.
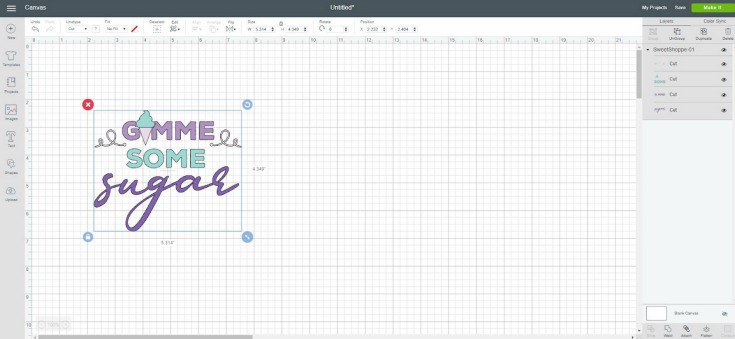
Your newly uploaded image will now be available in your personal image upload library.  Click on the image so it is highlighted in green and then click the green “insert images” in the bottom right hand corner.  This action will place the image onto your canvas.  From the canvas, you will be able to manipulate the layers, size, etc to personalize for your project.
I will be referring back to this post whenever there is a new image download available but you should pin it so you can find it easily!  
How to Upload Images into Cricut Design Space

About Us

We are passionate about sharing simple, fun DIY projects that anyone can tackle—whether you're a seasoned crafter or just getting started. From seasonal décor to everyday crafts, we love inspiring others to make something beautiful with their own two hands.

« Overview of Cricut Design Space
Nurse Week Tshirt | Free SVG File »

Popular Posts

Winter Decorations for After Christmas
This Gold Leaf Mason Jar Vase is keeping with the trends this spring! #spring #gold #goldleaf #masonjars

HALLOWEEN

This is such an easy recipe! You have GOT to try these Halloween Muddy Buddies! via createcraftlove.com
Pool Noodle Hacks: Halloween Edition via createcraftlove.com

THANKSGIVING

Create these Gold Pumpkin Votives for your Thanksgiving dinner table! via createcraftlove.com for @the36thavenue

CHRISTMAS

© 2019 · Create Craft Love·
  • Pinterest
  • Facebook
  • Twitter
