This post may contain affiliate links. See my disclosure policy for more details.
Sponsored by Cricut
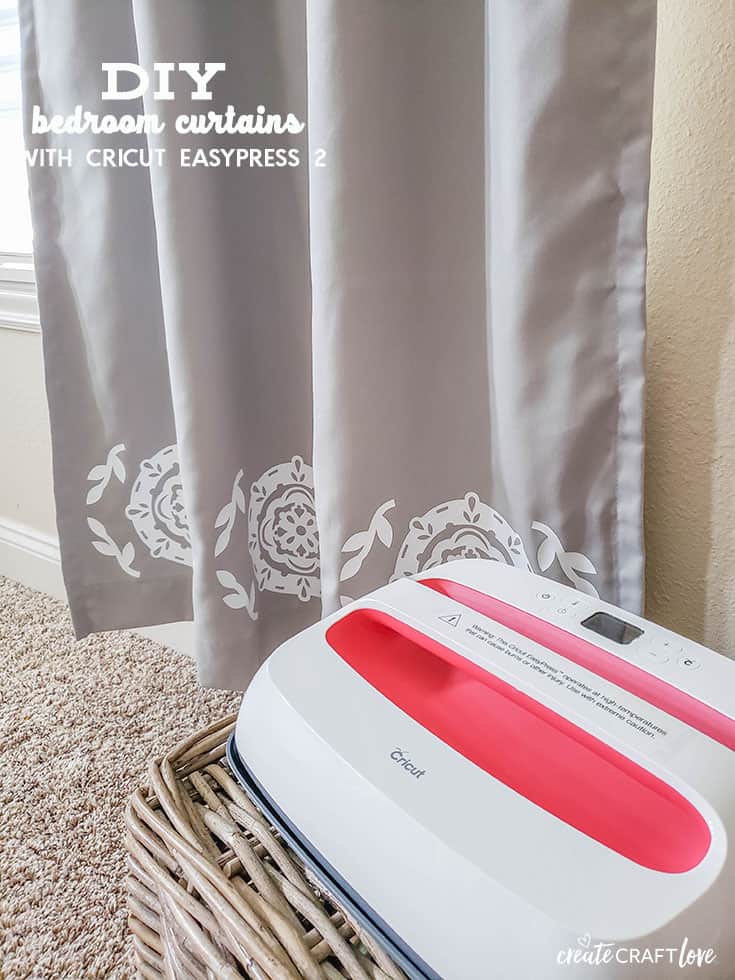
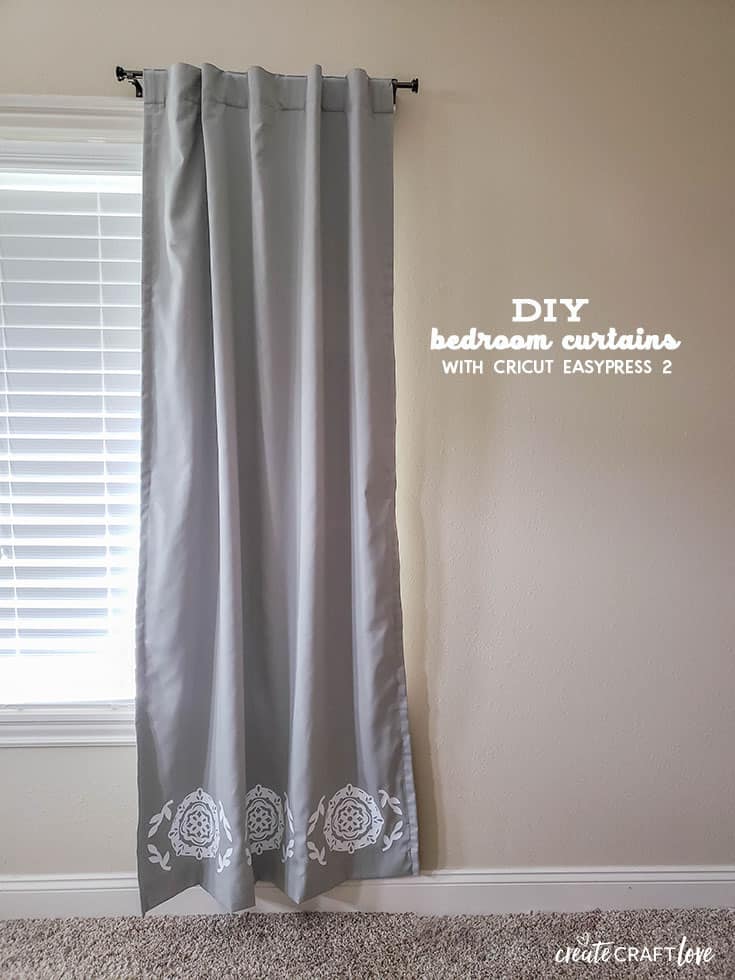
Turn boring old curtains into these fabulous DIY Bedroom Curtains with Cricut EasyPress 2!
This post contains affiliate links for your convenience.
We have lived in this house for 4 years. I am still deciding the look of my master bedroom. I have had 3 different bedspreads/quilts but I finally think I have found one I like. The problem I keep running into is the curtains. I wanted something that blocks out some light but I also wanted cute and compliments the bedspread. Unfortunately, the two do not seem to go together. I have had this design in my head for a while and when Cricut released the EasyPress 2 I decided to make my own!
I have the original EasyPress and I LOVE it. When Cricut announced the updated version in THREE different sizes, I knew I had to have one. (Plus I am swooning over that raspberry color!!) The unique sizes are great! They offer a 6×7, 9×9, and 12×10 which guarantees professional iron on success in less than 60 seconds. I tend to do a lot of larger projects – signs, shirts, bedroom curtains so the 12×10 is perfect for me. In that original post, I even discuss how I had to complete the design in two different sections due to the size of the image. Now I don’t have to do that!
Materials needed for DIY Bedroom Curtains
- Cricut Maker or Explore
- Cricut Light Grip Mat 12×12
- Cricut BrightPad
- Cricut EveryDay Iron On Vinyl (white)
- Cricut Basic Tool Set
- Cricut EasyPress 2 12×10
- Cricut EasyPress Mat 20×16
- Curtain panel
- Curtain rod
Images used for DIY Bedroom Curtains:
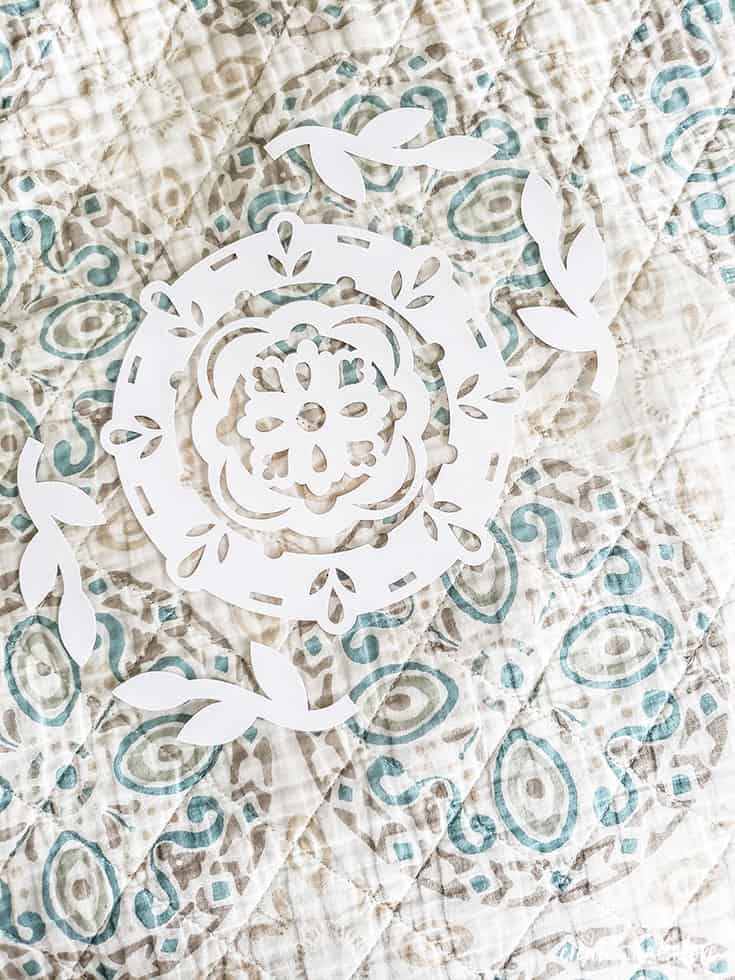
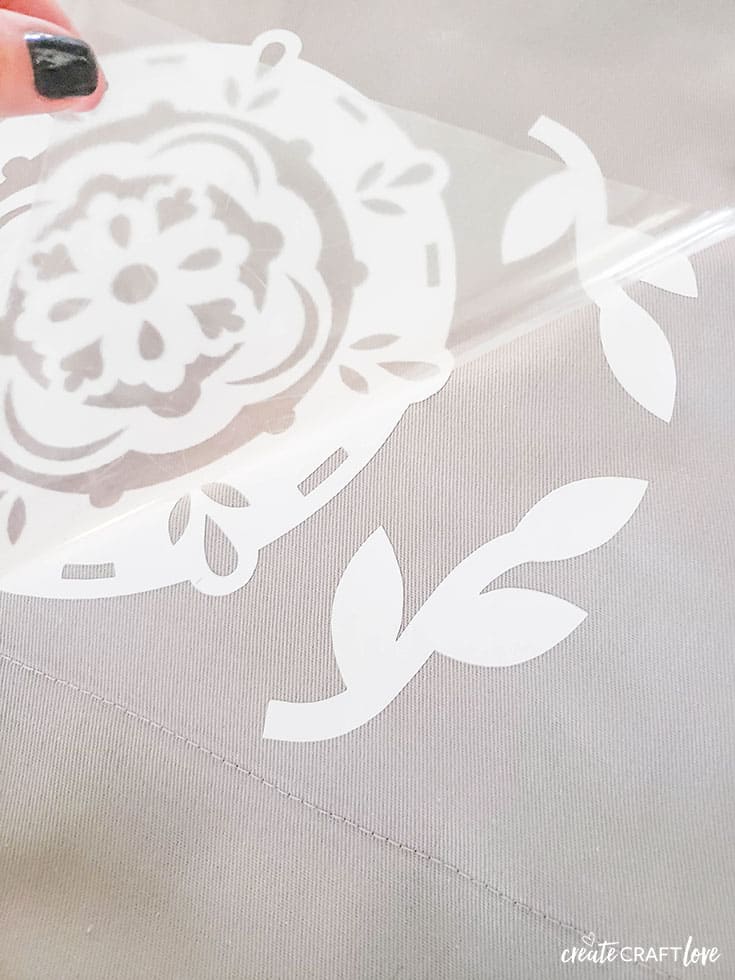
I wanted a design that was similar but not exact to the design in my bedspread. In Design Space, I contoured the above image to fit my needs. Follow the steps for cutting the image. Using my BrightPad, I weeded away the excess vinyl.
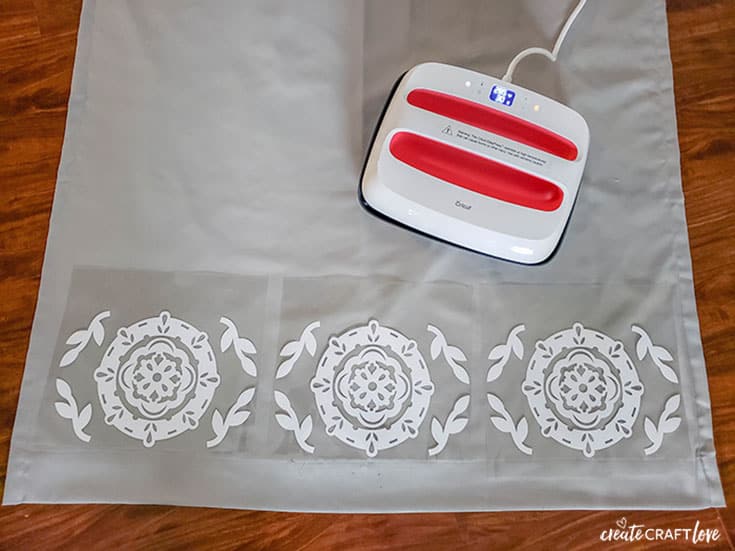
It was time to fire up the new EasyPress 2! It heats up much faster than the original EasyPress. The temperature range is higher on the EasyPress 2 as well – heats up to 400 degrees. My curtains were a cotton/polyester blend. According to the recommended settings table when using the EasyPress with the mat, I set mine temperature to 315 degrees for 30 seconds. The display is easy to read and simple to set.
While the EasyPress 2 was warming up, I arranged my designs on the curtains.
The EasyPress 2 will beep once it reaches desired temperature. Place the EasyPress mat below the material.
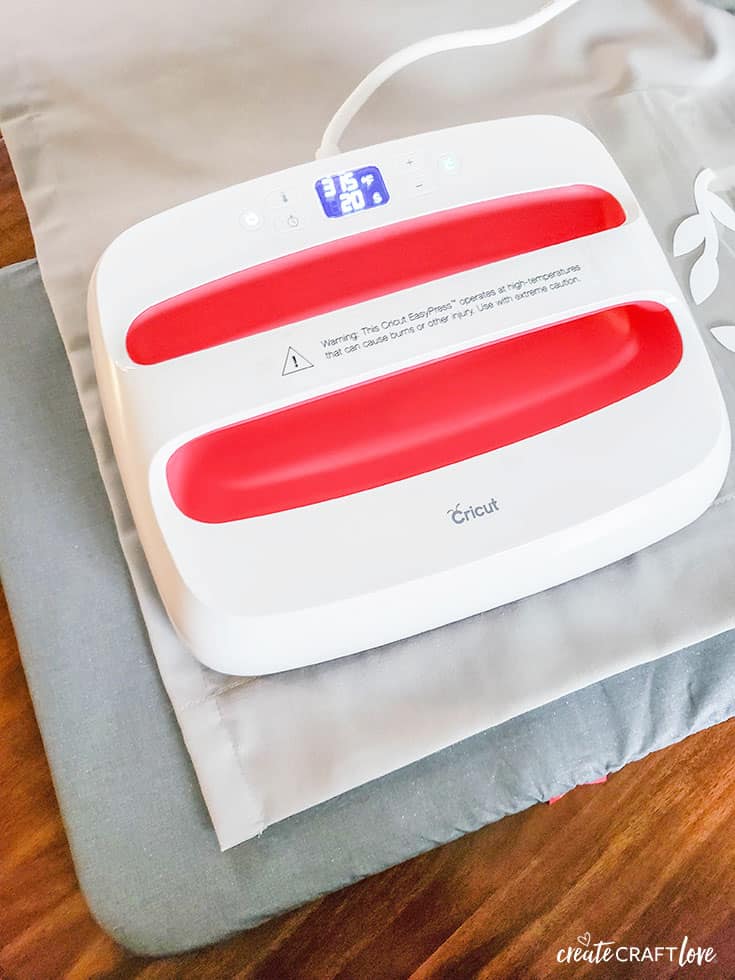
Remove the image and pre-heat the material for 5 seconds. Place the iron on vinyl design onto the pre-heated material. Remove the EasyPress 2 from it’s base and apply directly to the design image. Press the Cricut button to begin the timer. Apply a light amount of pressure on the EasyPress 2 as the timer lapses. The timer will beep when complete. Return the EasyPress 2 to its base. Allow the image to cool for 15 seconds and then gently peel back the liner.
The image adheres completely as a result of the ceramic coated heat plate allowing for dry, even heat for a flawless transfer. The safety base is insulated to protect the EasyPress 2 and the project.
Repeat the above process until all of the images have been applied.
Working with the Cricut line of iron on vinyl is so easy! The Everyday, Sportsflex and Glitter Iron On vinyl all have the Cricut Strongbond™ guarantee. These products are specifically designed to outlast 50+ times in the washer and dryer when applied as directed. Now you don’t have to worry about your projects peeling over time!
Click HERE to Make it Now!
I LOVE how these DIY Bedroom Curtains turned out! They really seem to go well with the rest of the room.
The EasyPress 2 is available NOW! These will make great Christmas gifts for the crafter in your life!
This is a sponsored conversation written by me on behalf of Cricut. The opinions and text are all mine.
