This post may contain affiliate links. See my disclosure policy for more details.
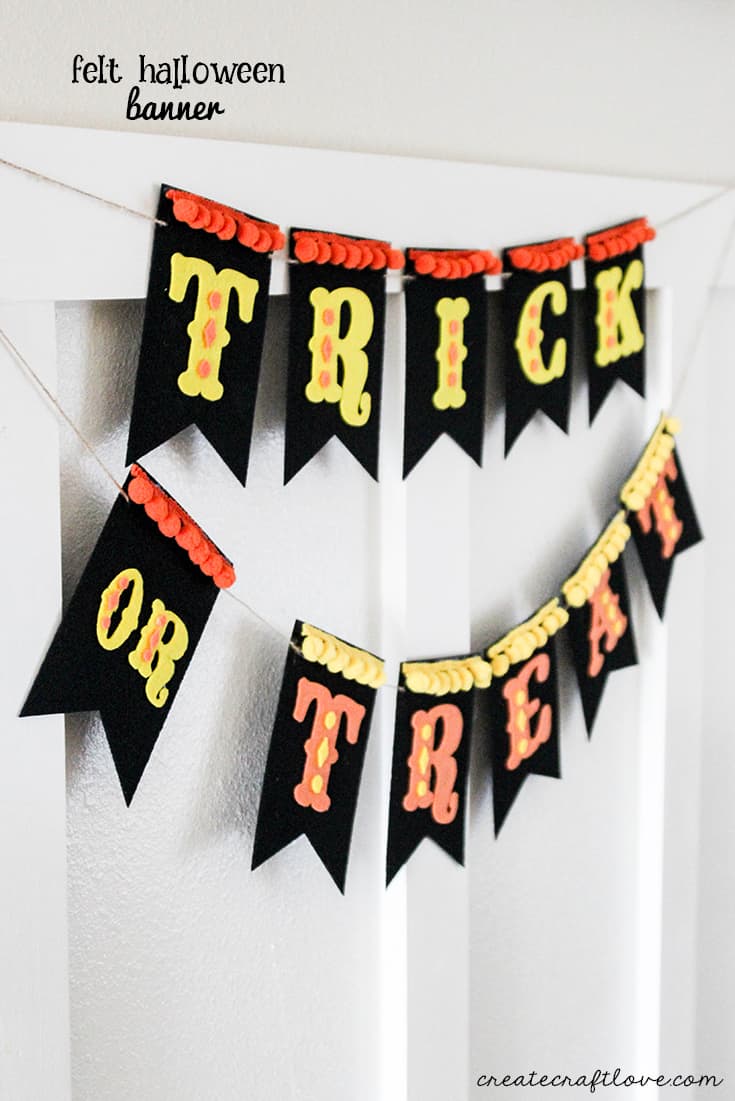
Create your own vintage holiday look with this Felt Halloween Banner!
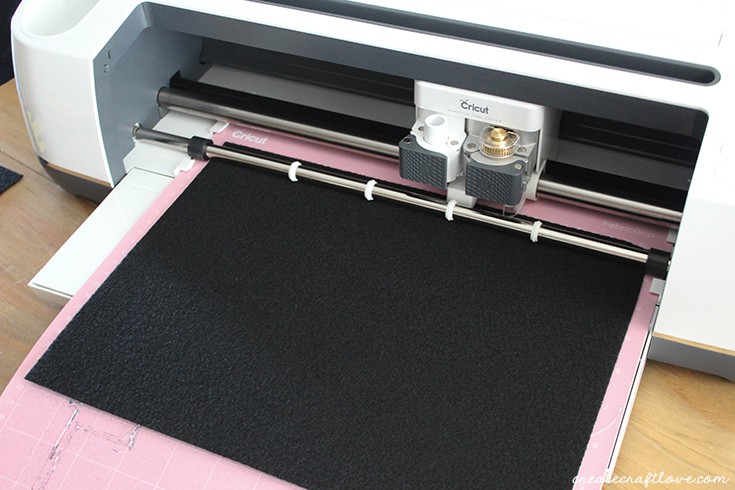
I know I sound like a broken record but I love my Cricut Maker! I cut ALL of the felt (including the tiny pieces on the lettering) with the machine. There were snags or anything. This machine is amazing! But if you’re looking for a new crafting tool, this is it. I use it for everything.
How to make your own Felt Halloween Banner
Cricut Maker
Fabric mat
Rotary blade
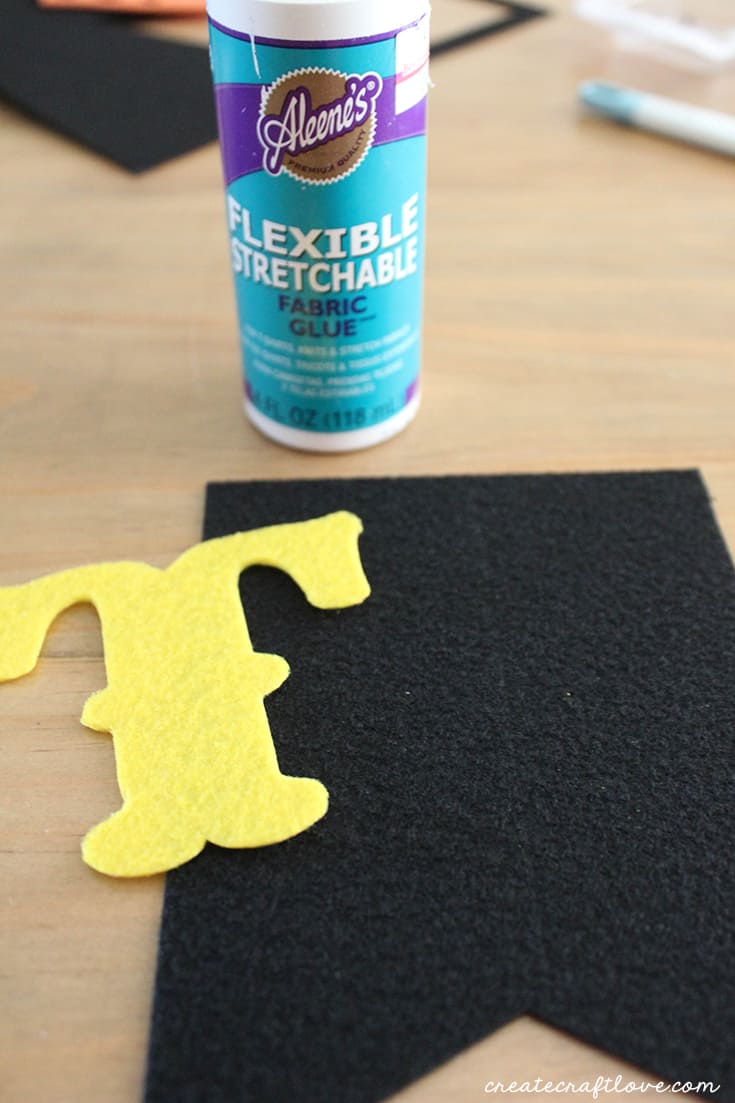
Felt squares from your local craft or fabric store (6 black, 2 yellow, 2 orange)
Fabric glue
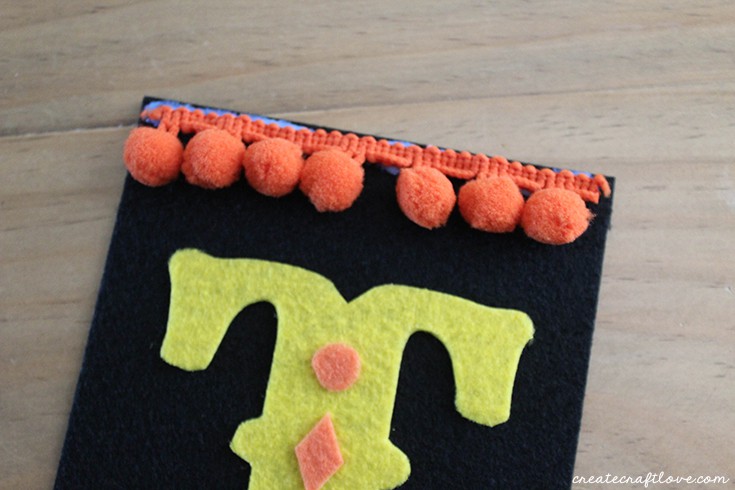
Pom pom garland (orange and yellow)
Twine
The font I used for the lettering is Coney Island. You can find it here. Simply download and follow directions for installing onto your computer. Design Space will automatically pull it in. I used the banner image from Banner #M3D0B5. You will need your fabric mat and the rotary blade for this project.
I prefer the stiffer felt squares you can purchase by the kids crafts for these kind of projects. It cuts easily and maintains its flat shape.
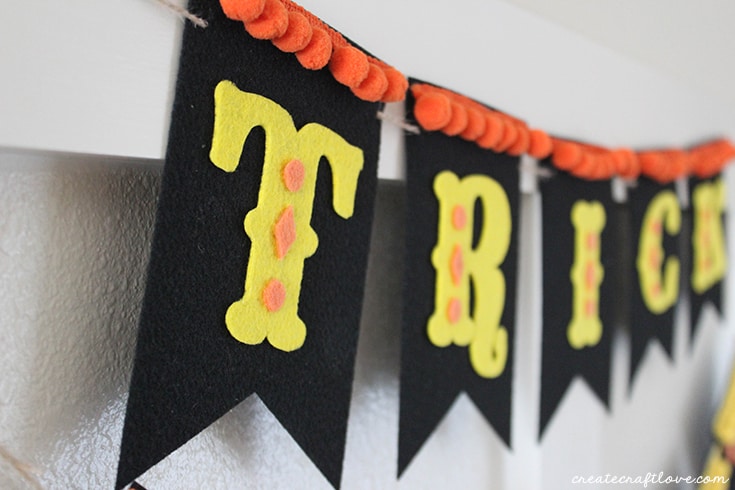
My banners are sized to be 4 inches wide. You will need to cut 11 of these. Two should fit on each felt square.
My letters are sized to 3 inches wide EXCEPT for the “or” where the letters are sized to 1.5 inches each.

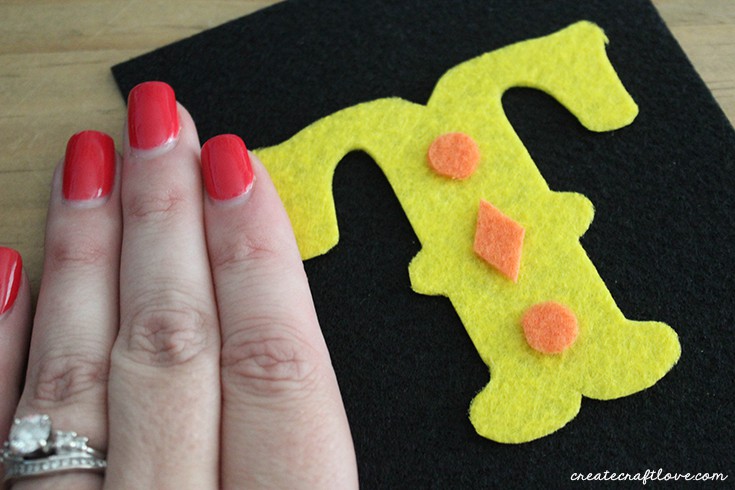
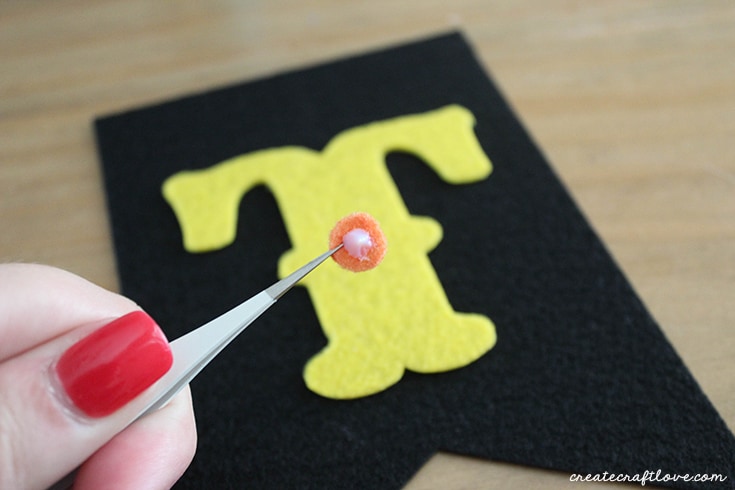
To create the details on the lettering, I used the shape tool on the left hand menu and sized two circles and a diamond for each letter. I can’t believe it cut that small!
Assembling the banner
Each black banner piece will need a letter and the detailing. Begin by using fabric glue to glue the letter to the black piece. Use fabric glue to attach the detail pieces as shown above.
The exception of course is the “or” piece. You will glue the smaller “O” and “R” to the same black piece and then glue details on each piece.
Set aside and allow fabric glue to dry before adding the pom pom garland to each piece.
To add the pom pom garland, I measured each one by hand, cut to the appropriate length and then glued to the top edge of each banner piece.
Once the glue is dry, string your letters with twine through the slits the machine cut for you. Display proudly for all of your guests this Halloween!
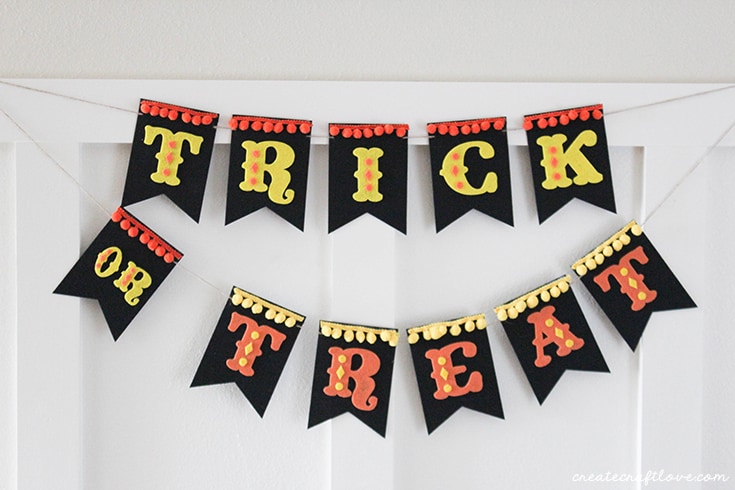
I have to tell you, I LOVE how this turned out! I was inspired by the one I saw in the Pier One fall catalog and honestly, I like mine better!