This post may contain affiliate links. See my disclosure policy for more details.
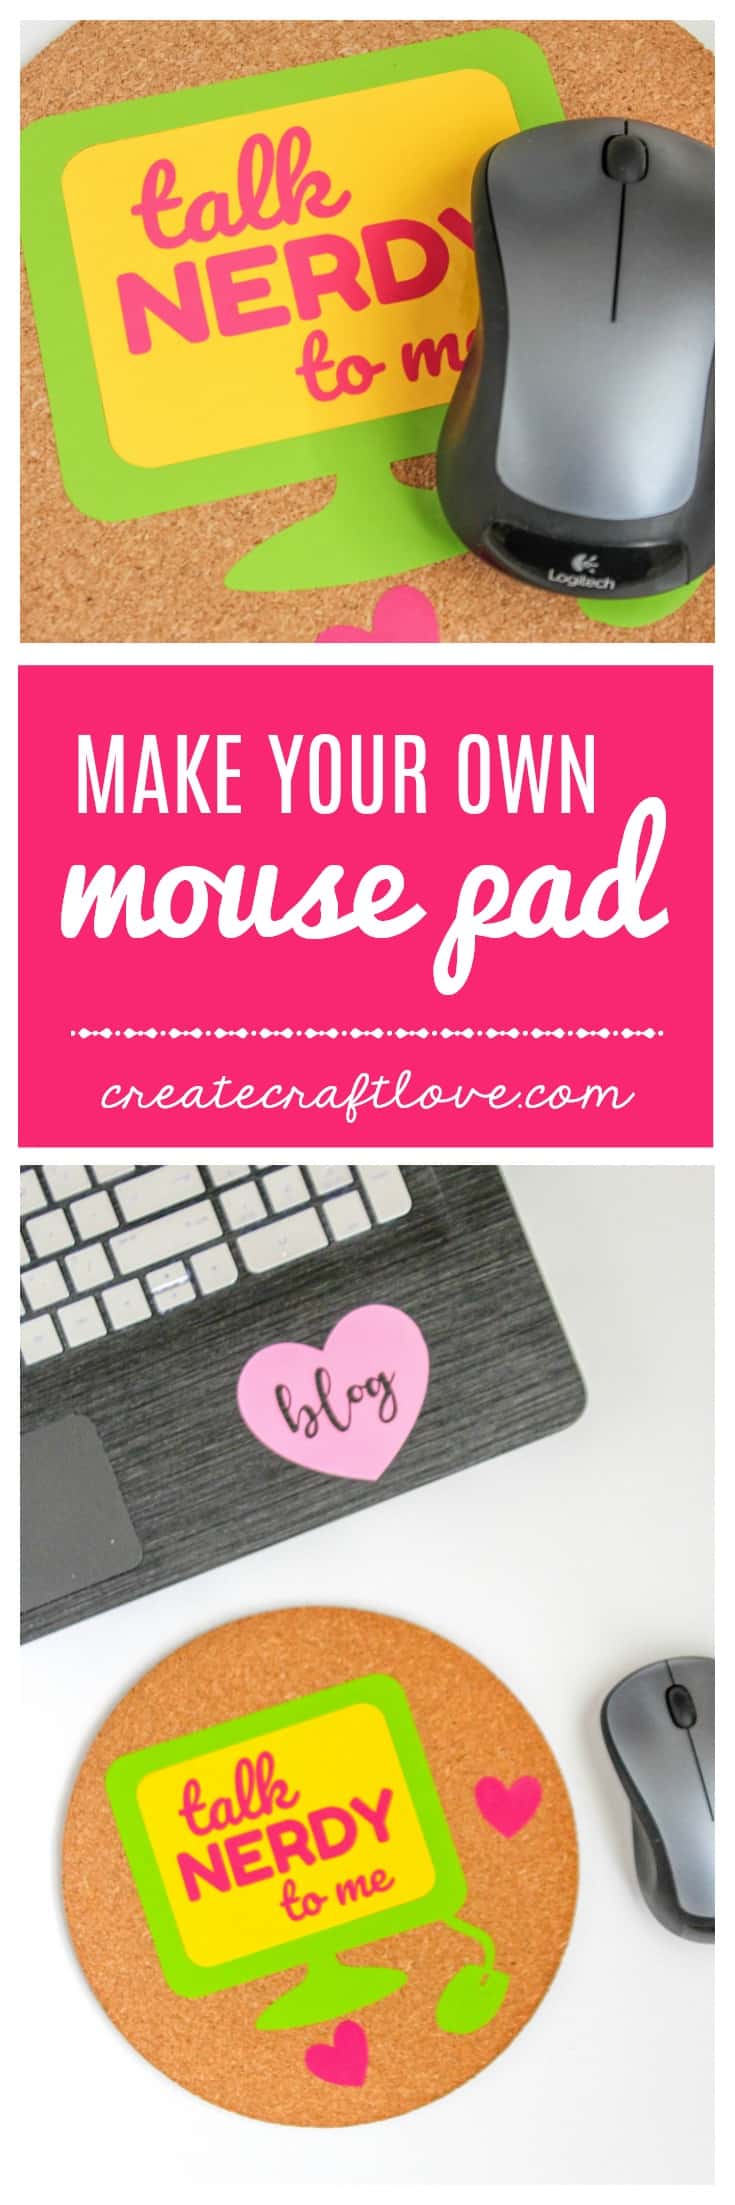
Make your own mouse pad! All you need is a cork mat, some adhesive vinyl and my free SVG file!
This post contains affiliate links for your convenience.
Here’s what you need to make your own mouse pad!
Cricut Explore
Adhesive vinyl
Transfer tape
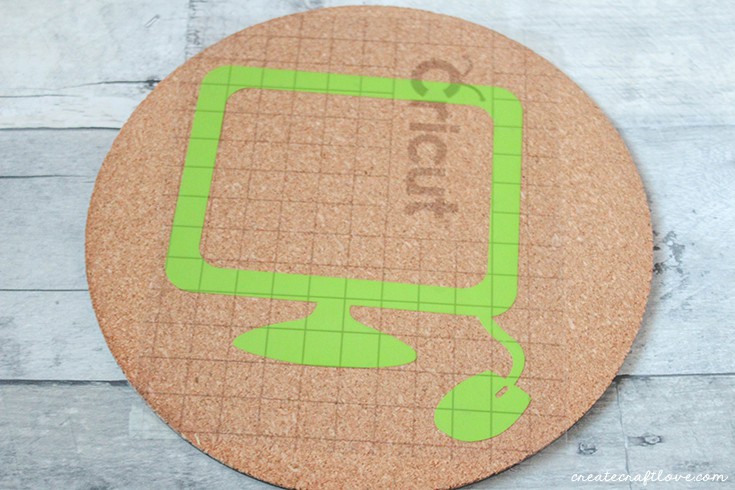
Cork mat
I purchased my 8 inch cork mat at Home Depot. I’m sure you can find them at other hardware stores too.
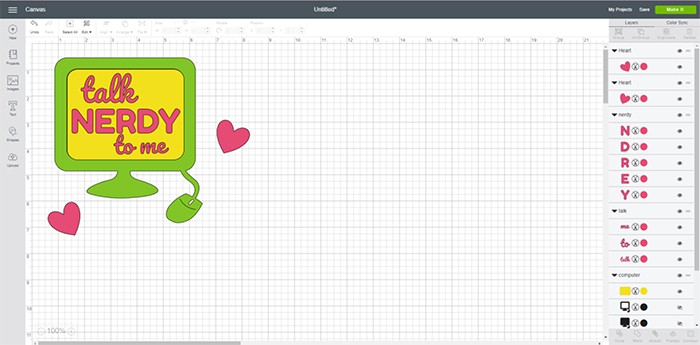
You will need to download my “talk nerdy to me” cut file. You can find it HERE!
Open design space and search for the computer image. To customize it with the colored computer screen, I duplicated the computer image and contoured it leaving just the screen. Upload the SVG cut file. Select the image you uploaded and attach. Then size to fit the computer screen. Color code them according to what vinyl you wish to use.
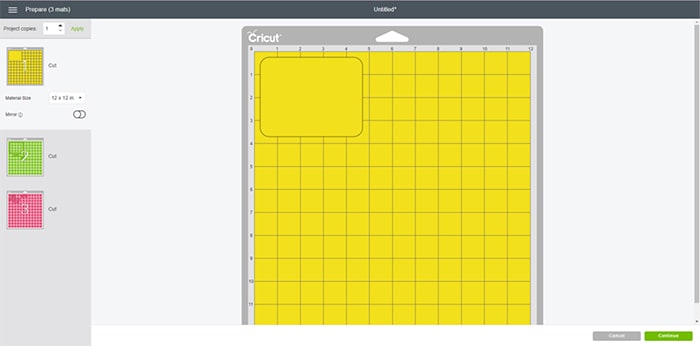
When you send the design to the cut screen you should get three different mats.
Cut the image. Once completed, weed out the negative vinyl. Transfer the computer image to the cork mat first.
Add the yellow screen to the middle of the computer image. I did not use transfer tape for this part since it was a simple rectangle.
Transfer the text to them middle of the screen. Finally, add the hearts around the outside of the computer.
After you have your vinyl in place. You will need to seal it by adding a thin layer of mod podge over the entire surface area.
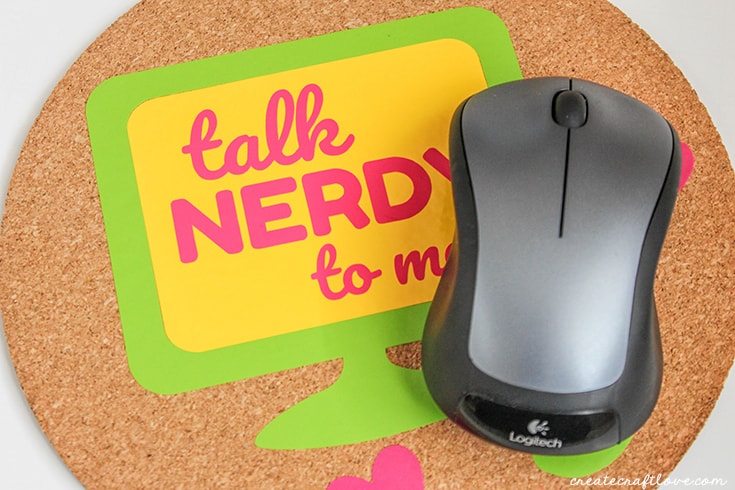
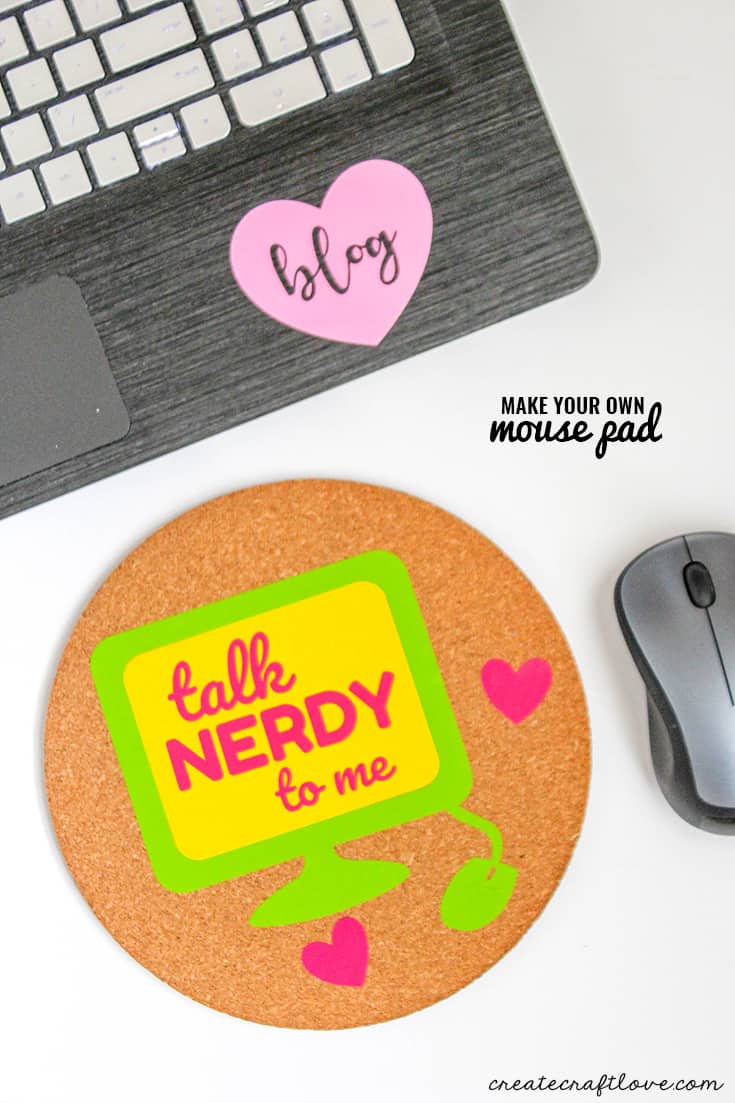
How cute is that? Perfect for the college student embarking on new adventures or to add a little color to your home office!
I’d love for you to pin this image!