• Home
  • Crafts
    • Wreaths
    • Back to School Crafts
    • Christmas Crafts
    • Father’s Day Crafts
    • Fourth of July Crafts
    • Halloween Crafts
    • Kid’s Projects
    • Mother’s Day Crafts
    • Thanksgiving Crafts
    • Valentine’s Day Crafts
  • Recipes
    • Christmas Recipes
    • Fourth of July Recipes
    • Halloween Recipes
    • Thanksgiving Recipes
    • Appetizers
    • Beverages
    • Breakfast
    • Dessert
    • Main Dish
    • Side Dish
    • Soups & Salads
    • Snacks
  • Freebies
    • Back to School Printables
    • Christmas Printables
    • Father’s Day Printables
    • Fourth of July Printables
    • Halloween Printables
    • Mother’s Day Printables
    • Thanksgiving Printables
    • Valentine’s Day Printables
  • xTool
  • About
    • About CCL
    • Privacy Policy
    • Disclosure
    • Contact Us
    • Email
    • Facebook
    • Instagram
    • Pinterest
    • RSS
    • Twitter

Create Craft Love

October 16, 2015 ·

Scrappy Fabric Garland

Halloween Decor

  • Facebook
  • Twitter

This post may contain affiliate links. See my disclosure policy for more details.

Add a little pop to your holiday decor with this fun Scrappy Fabric Garland!

This Scrappy Fabric Garland can be customized for any holiday or occasion! via createcraftlove.com

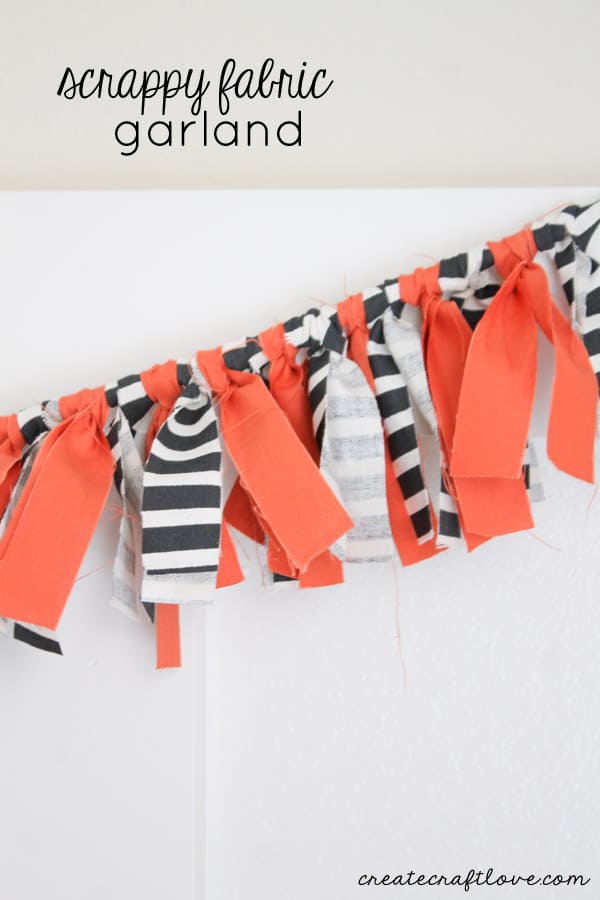
If you saw my Halloween Breakfast Nook, you may have noticed the adorable garland I have hanging across my board and batten.  I used the remaining fabric from my Haunted House Pillows to create this Scrappy Fabric Garland.  It really looks cute and the best part is you can customize this to any holiday or occasion!

This post contains affiliate links for your convenience.

Materials needed to make Scrappy Fabric Garland

1/2 yard of coordinating fabrics
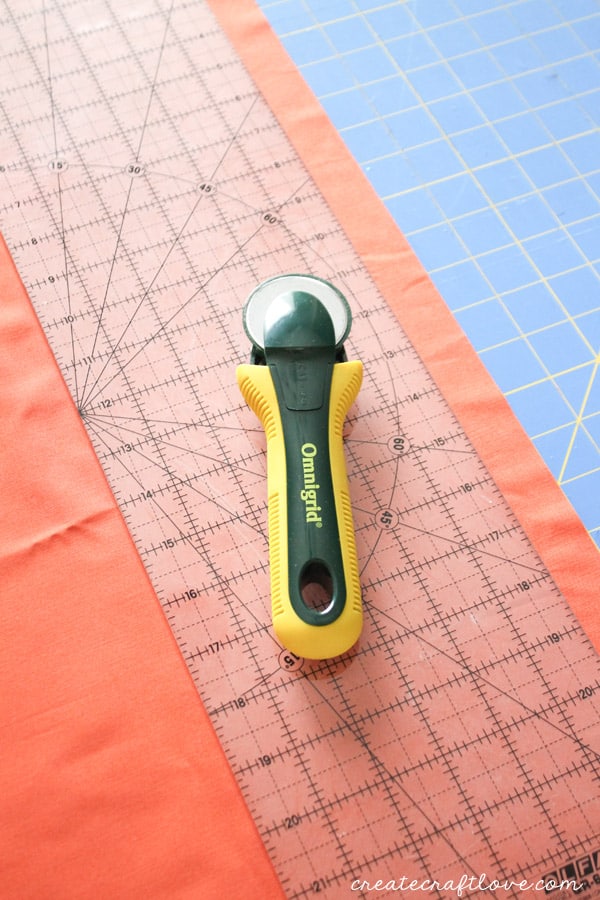
Rotary cutter, mat and acrylic ruler
Hemp rope

All you need is 1/2 yard of coordinating fabrics, rotary cutter, mat, acrylic ruler and hemp rope.

I began by cutting my fabric in 1 inch strips. Place your fabric on the cutting mat and square up with the grid. Use your acrylic ruler to measure over 1 inch. Run your rotary blade along edge of the acrylic ruler to cut the desired length. Continue this process until all of the fabric has been cut.

scarppy fabric garland 1

Once my lengths of fabric were cut, I cut those 1 inch strips in to 10 inch increments.  So you should be able to get 4 pieces per 1 inch strip.

scarppy fabric garland 2

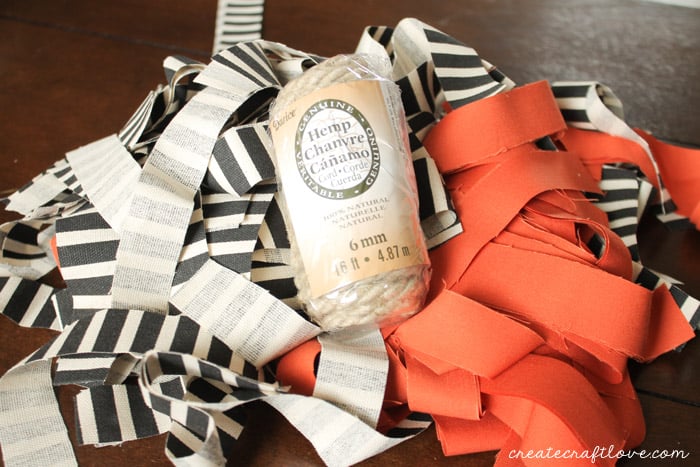
Grab your hemp rope and measure to the length you need.

To attach the fabric to the rope, you are going to use a Lark’s Head Knot to attach each strip of fabric.  Fold each strip in half.  Lay the rope over the folded strip and pull the strip through the loop to secure around the rope.

larksheadknot_1
Source
scarppy fabric garland 3

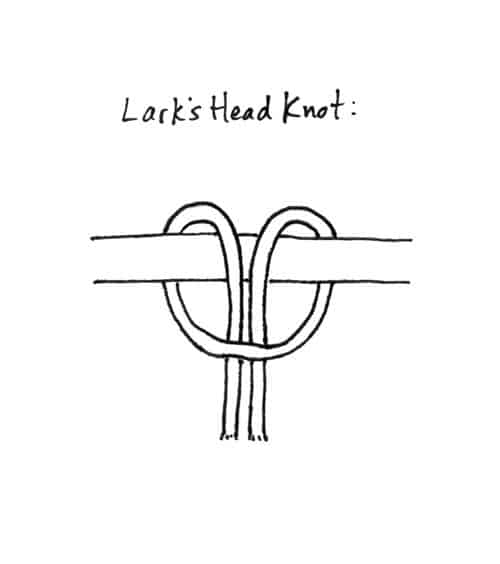
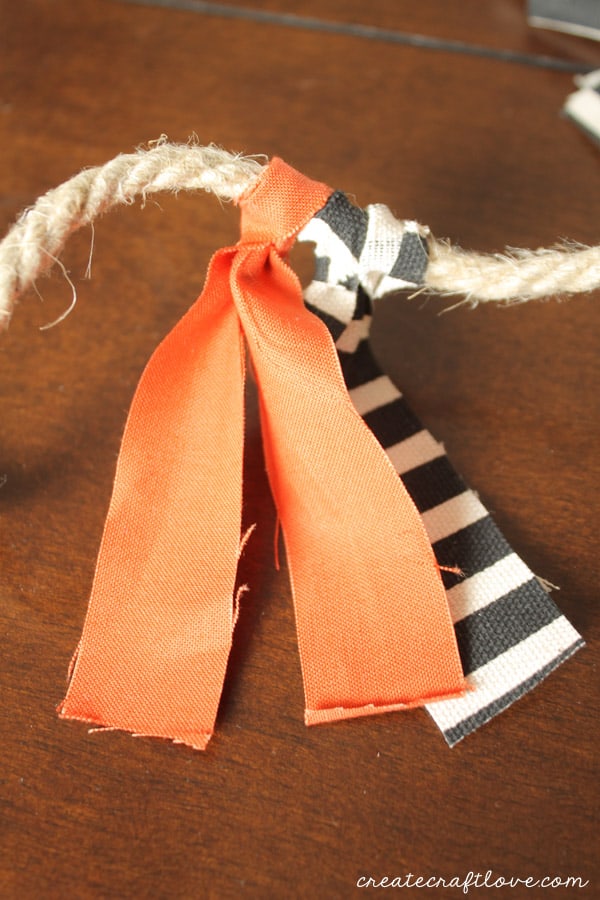
 Continue adding the fabric strips until the rope is full.

scarppy fabric garland horizontal

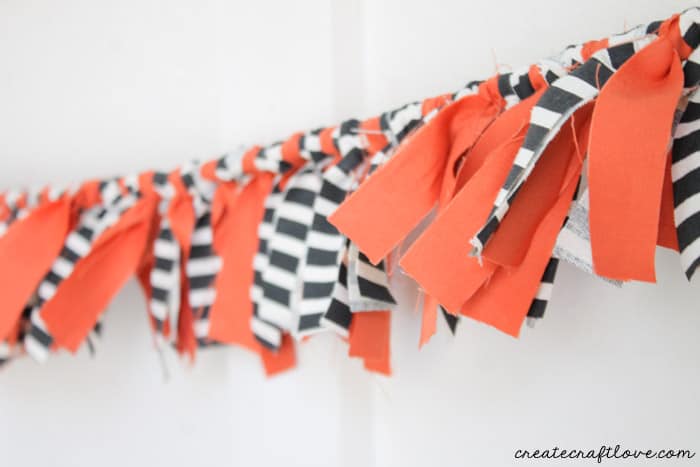
It really was super easy to make!  The entire 8 foot garland took me about 30-45 minutes to complete and I love how it turned out! You can make the fabric strips longer or shorter depending on the look you are going for.

Imagine all the possibilities – Christmas, birthdays, Valentine’s Day…

About Us

We are passionate about sharing simple, fun DIY projects that anyone can tackle—whether you're a seasoned crafter or just getting started. From seasonal décor to everyday crafts, we love inspiring others to make something beautiful with their own two hands.

« Haunted House Pillow
Paper Leaf Garland »

Popular Posts

Winter Decorations for After Christmas
This Gold Leaf Mason Jar Vase is keeping with the trends this spring! #spring #gold #goldleaf #masonjars

HALLOWEEN

Creating your own Halloween Shirt has never been easier than with Cricut Easy Press!
Here are some of the best No Carve Pumpkin Decorating Ideas around the blogosphere!

THANKSGIVING

Add a little something extra to your table with these Hand Stamped Placemats! via createcraftlove.com
Close up picture of Fall Leaf Garland

CHRISTMAS

upclose gift tag
yarn wrapped monogram gift tags
© 2019 · Create Craft Love·
  • Pinterest
  • Facebook
  • Twitter