• Home
  • Crafts
    • Wreaths
    • Back to School Crafts
    • Christmas Crafts
    • Father’s Day Crafts
    • Fourth of July Crafts
    • Halloween Crafts
    • Kid’s Projects
    • Mother’s Day Crafts
    • Thanksgiving Crafts
    • Valentine’s Day Crafts
  • Recipes
    • Christmas Recipes
    • Fourth of July Recipes
    • Halloween Recipes
    • Thanksgiving Recipes
    • Appetizers
    • Beverages
    • Breakfast
    • Dessert
    • Main Dish
    • Side Dish
    • Soups & Salads
    • Snacks
  • Freebies
    • Back to School Printables
    • Christmas Printables
    • Father’s Day Printables
    • Fourth of July Printables
    • Halloween Printables
    • Mother’s Day Printables
    • Thanksgiving Printables
    • Valentine’s Day Printables
  • xTool
  • About
    • About CCL
    • Privacy Policy
    • Disclosure
    • Contact Us
    • Email
    • Facebook
    • Instagram
    • Pinterest
    • RSS
    • Twitter

Create Craft Love

July 22, 2013 ·

DIY Ice Cream Parlor Table

DIY

  • Facebook
  • Twitter

This post may contain affiliate links. See my disclosure policy for more details.

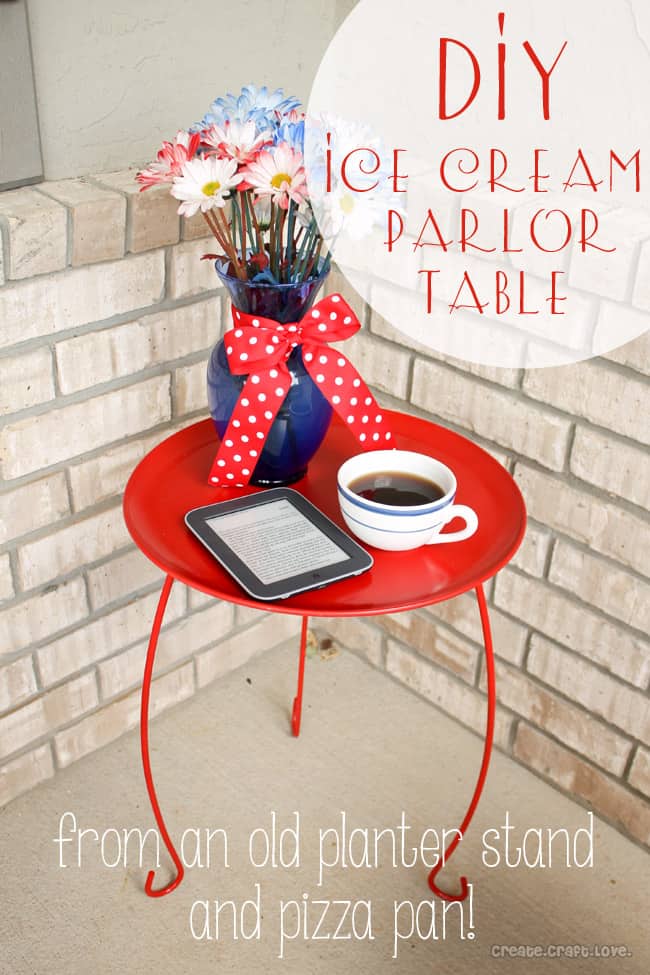
Last week I shared with you my DIY Ice Cream Parlor Set with the promise of telling you the story behind the table.  Since my adorable chairs had no mate, I had to go out and find one.  I can find a table, right?  I searched high and low.  Southern Missouri is thrift/antique store central.  No luck.  But the DIY-er in me would not be satisfied without that table.  So I made one.  Out of a planter stand and pizza pan.  With E6000.  You too can make your own DIY Ice Cream Parlor Table!

DIY Ice Cream Parlor Table via createcraftlove.com #DIY #outdoor #furniture #table

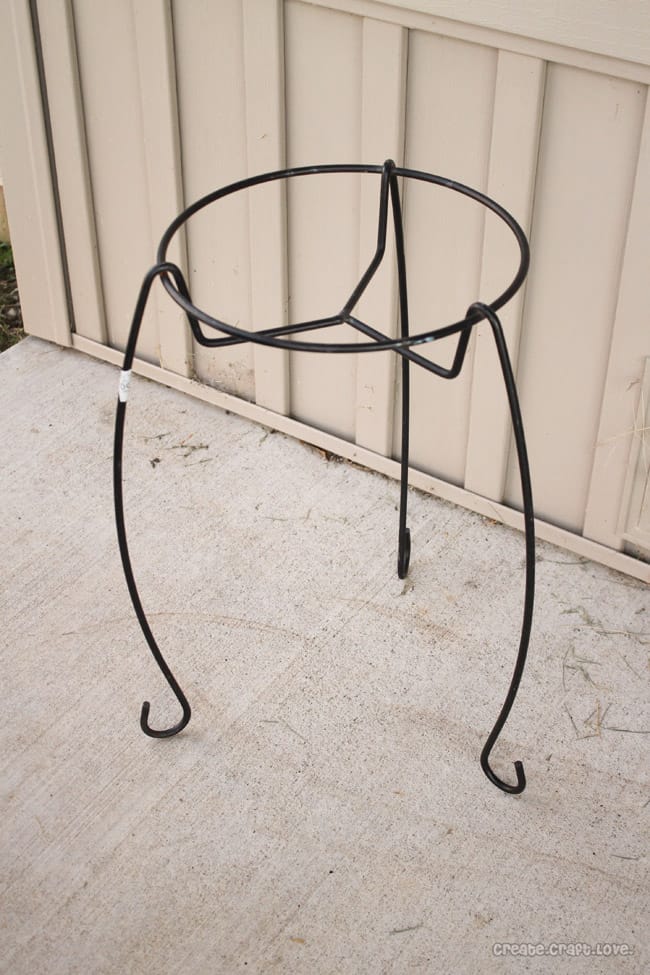
Don’t believe me?  Here are the before pictures!

First, my lonely little planter stand.

icecreamparlortableraw

Now my pizza pan and E6000.

icecreamparlortablepizza

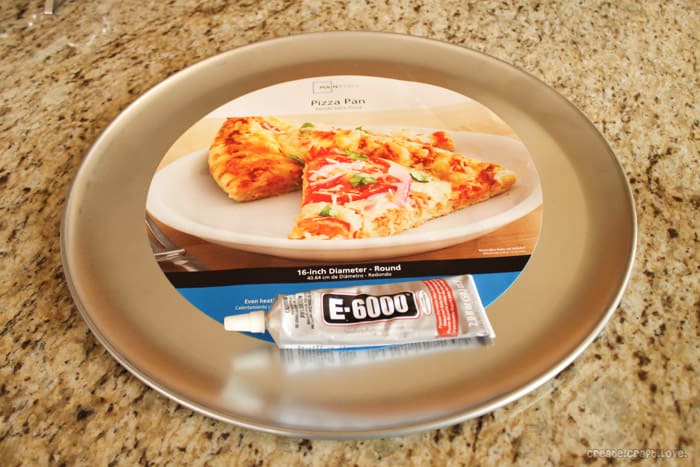
I know, right?  Genius.

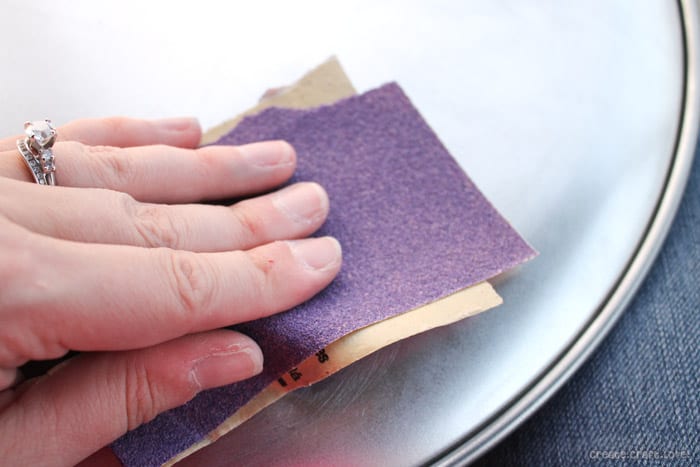
Begin by sanding the surfaces you are gluing – the back of the pan and the top of the planter stand.  This will help the E6000 to adhere to the surfaces.

icecreamparlortablesanding

Next we need to measure where the center is.  I am sure there is an actual scientific equation complete with circumferences and center points, but I got a C in geometry.  You will have to make due with MY way of measuring.  hee hee

I placed the pizza pan upside down on the ground and place the planter stand on top of it as close to center as possible.  Then I measured from the edge of the planter stand to the edge of the pan.  Turns out center is about two inches from the edge all the way around.

icecreamparlortablemeasure

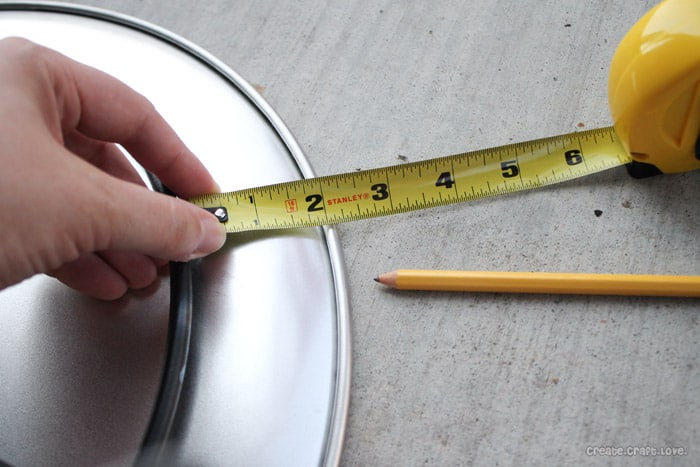
Mark your glue points with the pencil.

Next apply the E6000 to each of the surfaces.  Allow to cure for 10 minutes BEFORE placing the surfaces together.  Once the surfaces are joined together, do not touch it.  Be patient and leave it alone.  It takes awhile for it to set.  I left it alone for 24 hours.

Once it is set, begin priming with the spray primer.   Then paint the color of your choosing and seal with a clear polyurethane coating.

DIY Ice Cream Parlor Table via createcraftlove.com #DIY #outdoor #furniture #table

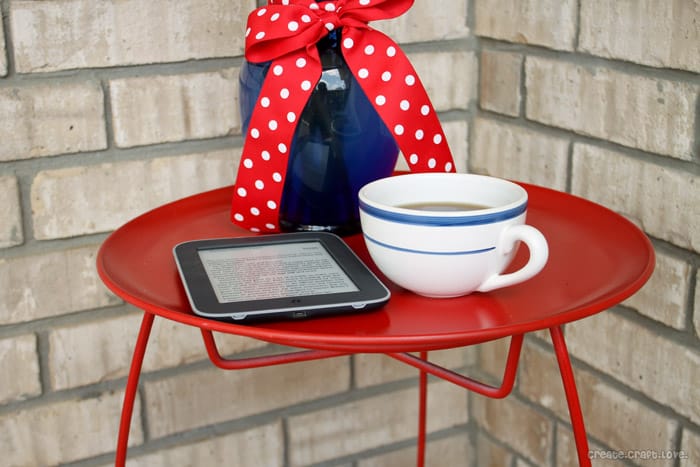
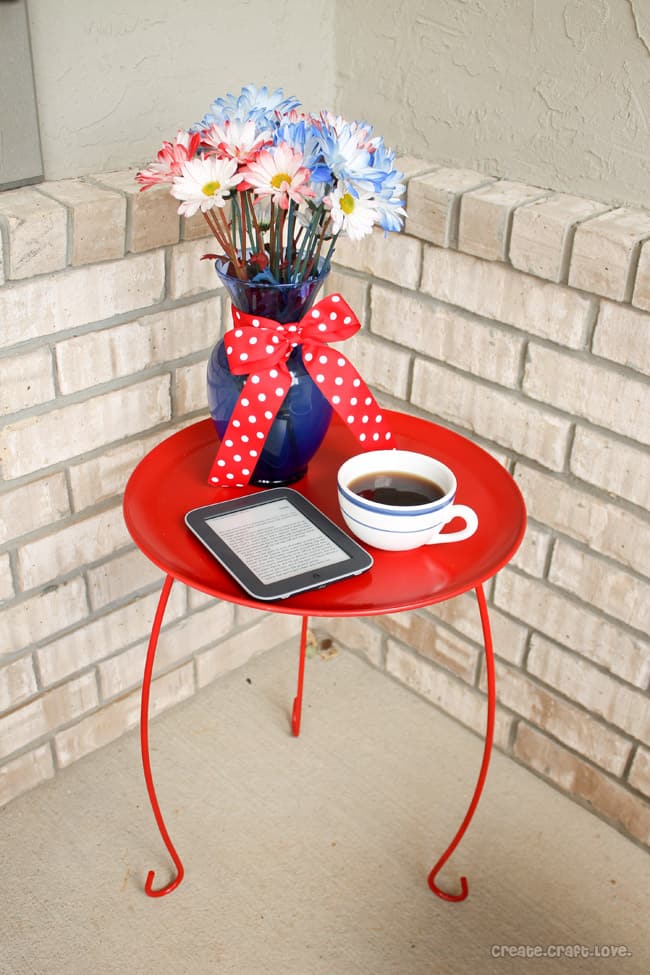
It’s perfect for sitting out on the porch and reading in the morning!

DIY Ice Cream Parlor Table via createcraftlove.com #DIY #outdoor #furniture #table

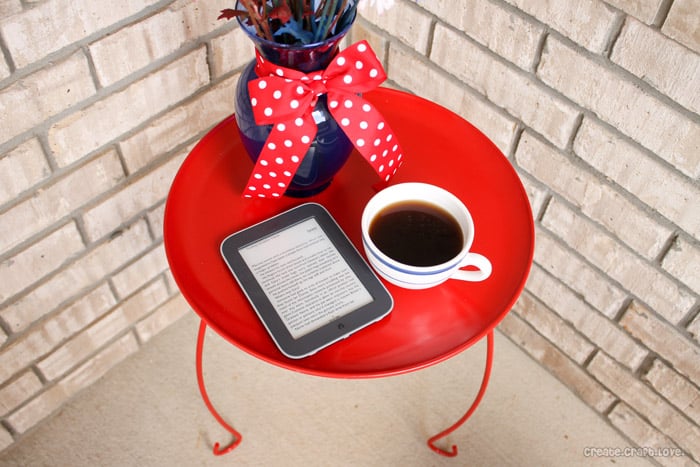
Can you believe how close it turned out?  I am so proud of this little table.  And it’s one of a kind!

DIY Ice Cream Parlor Table via createcraftlove.com #DIY #outdoor #furniture #table

Want to know the best part?  The whole thing cost me $3.88!!  {Cost of the pan}

What have you custom built?


About Us

We are passionate about sharing simple, fun DIY projects that anyone can tackle—whether you're a seasoned crafter or just getting started. From seasonal décor to everyday crafts, we love inspiring others to make something beautiful with their own two hands.

« Simple Round Cushion Tutorial
Top Ten Thirst Quenching Summer Beverages »

Trackbacks

  1. {The Creative Connection 4} - Wait Til Your Father Gets Home says:
    July 25, 2013 at

    […] DIY Ice Cream Parlor Table from Create.Craft.Love. […]

    Reply
  2. The Creative Connection 07/25 - Becoming Martha says:
    July 26, 2013 at

    […] DIY Ice Cream Parlor Table from Create.Craft.Love. / Perfect Grilling Menu from Becoming Martha / Washi Tape Notecards from Wait Til Your Father Gets Home / DIY Desk Chair from Chase the Star / Updated Storage Baskets from Making Home Base […]

    Reply
  3. Get Your Color On! Red | Creative Blossoming says:
    September 24, 2013 at

    […] of spiffy repurposing projects, Jill from Create.Craft.Love shows you how she made this punchy red side table with a plant stand and…. I love how budget-friendly her table was and the happy energy it gives her […]

    Reply
  4. Get Your Color On! Red | The DIY Homegirl says:
    November 17, 2013 at

    […] of spiffy repurposing projects, Jill from Create.Craft.Love shows you how she made this punchy red side table with a plant stand and…. I love how budget-friendly her table was and the happy energy it gives her […]

    Reply

Popular Posts

Winter Decorations for After Christmas
This Gold Leaf Mason Jar Vase is keeping with the trends this spring! #spring #gold #goldleaf #masonjars

HALLOWEEN

Design your own Gothic Halloween Invitations and let the Cricut Explore do the rest! #halloween #gothichalloween #cricutteam5 #designspacestar
These Bewitching Pumpkins are sure to cast a spell on you! Whip them up in 5 minutes! via createcraftlove.com #pumpkins #halloween

THANKSGIVING

CHRISTMAS

© 2019 · Create Craft Love·
  • Pinterest
  • Facebook
  • Twitter