This post may contain affiliate links. See my disclosure policy for more details.
Although I was not directly compensated by Cricut, this post is being considered for a prize. This post contains affiliate links.
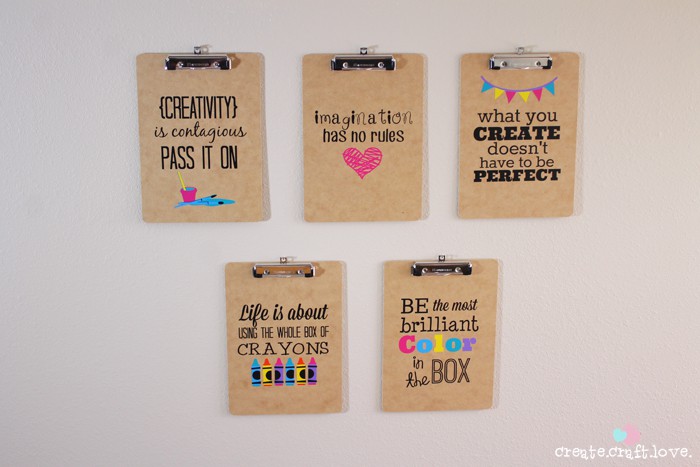
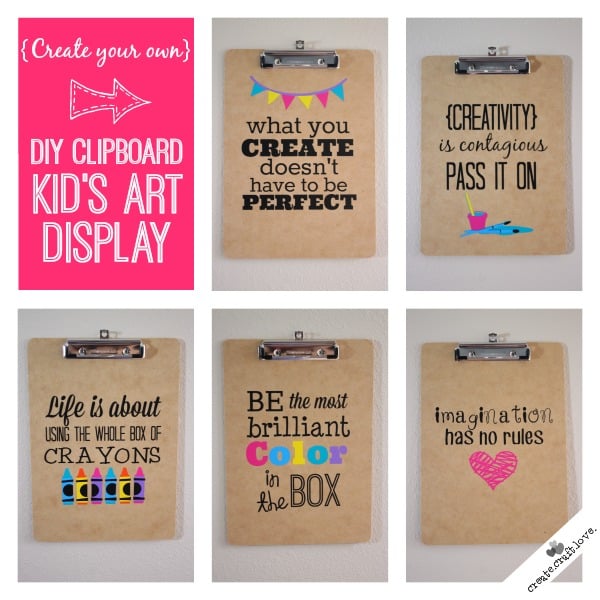
Here’s the scoop. Cricut divided us into teams and challenged each team to come up with a project for home decor. Since I am a proud member of Team 5. We decided our home decor project should include or feature the number “five”. {Today’s number is 5!} I created this Clipboard Kids Art Display with 5 artistic and creative quotes that would be perfect for any kids playroom. And it looks great with or without artwork!
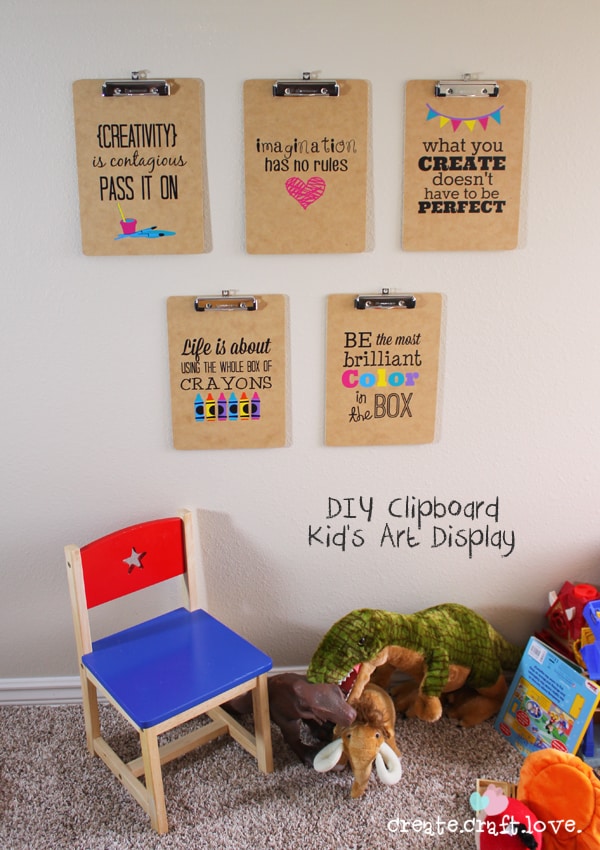
This tiny wall is in the Man Cave. That is what my husband and son have officially named their playroom/den above the garage. I apologize for the strange angle on the pictures.
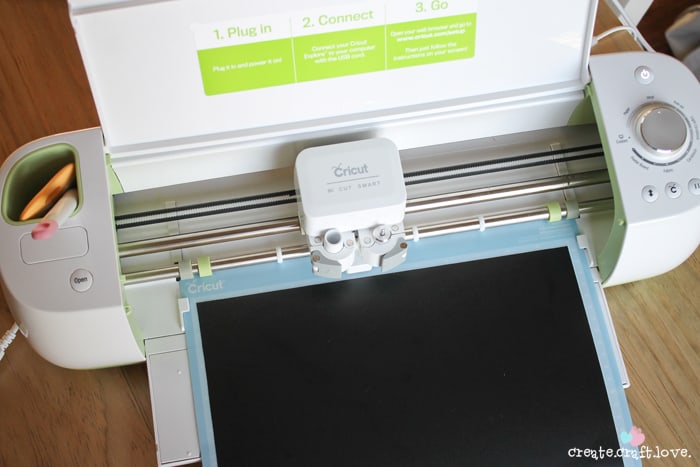
To create this Clipboard Kids Art Display, you will need:
Cricut Explore
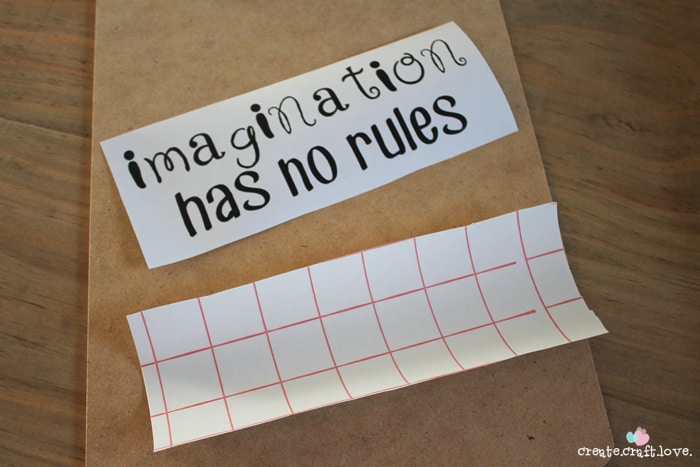
Adhesive vinyl
Transfer tape
Clipboards
I created these quotes as a PNG file in Picmonkey then uploaded them into Design Space. Size to adequately fit your clipboard and begin cutting.
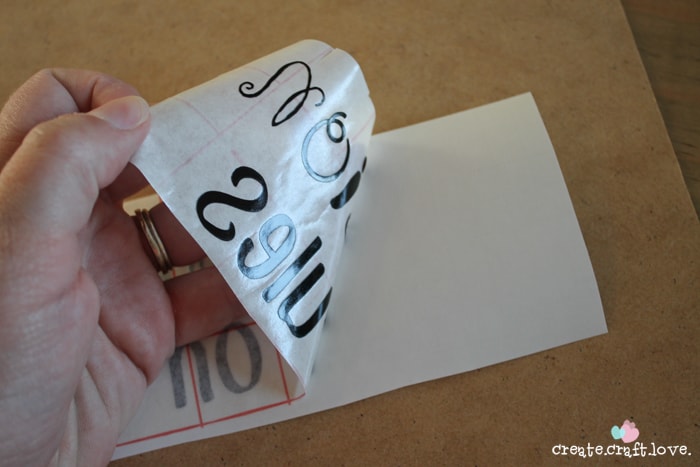
Once your design is cut, weed the extra vinyl from the lettering and cut a piece of transfer tape to the size of your image.
Slowly, peel back the transfer tape and lay it on the image {sticky side down}. Use your scraper to make sure the vinyl adheres well to the transfer tape.
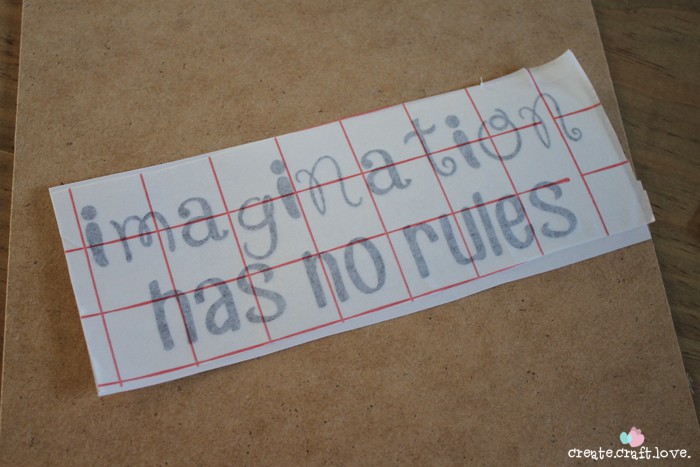
Peel the transfer tape from the backing. The vinyl should be stuck to the sticky side of the transfer tape.
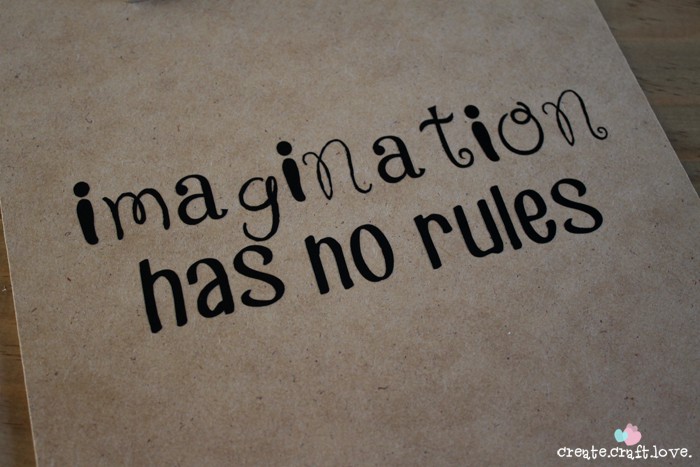
Apply to the clipboard. Once you are sure it is centered, press down. Use the scraper to press the vinyl on the clipboard. Carefully remove the transfer tape. Your image will be stuck to the clipboard!
Keep repeating until you have all of the clipboards done!
I love vinyl! You can put it on everything!
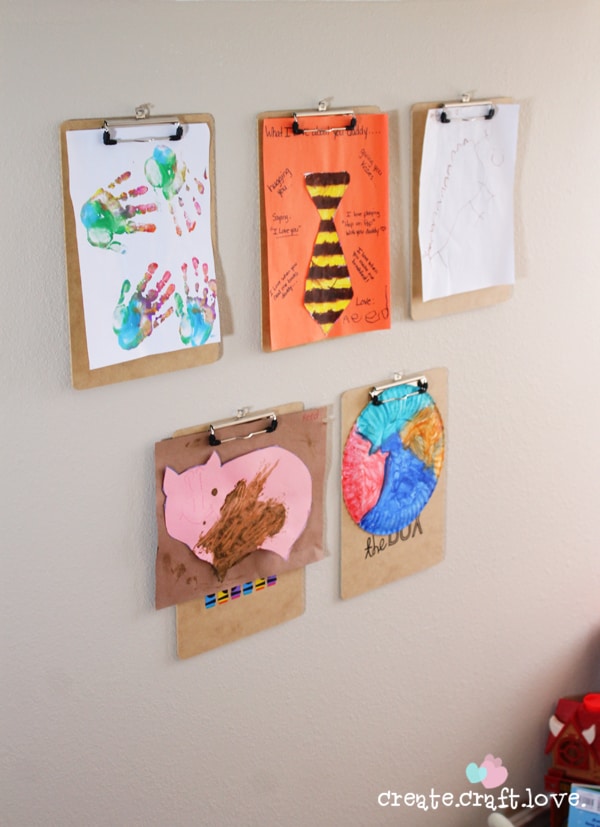
Reed loves that he has somewhere to display all of his artwork! How cute is that muddy pig?
Love these quotes!
The best part? Cricut is giving away a new Explore machine every day until the end of July! To enter, simply take a picture of a project (ANY project) and post to Facebook, Instagram or Twitter. Be sure to use the hashtag #IMadeIt and #cricut! (It would be pretty cool if you tag me too so I know you’re a reader! @createcraftlove) Click HERE for official entry rules!

Shop our cutting machine collection at Cricut.com

[…] Create Craft Love – Five DIY Clipboard Kids Art Display […]