This post may contain affiliate links. See my disclosure policy for more details.
Fill up a large empty space by adding this Faux Board and Batten Accent Wall with a picture ledge!
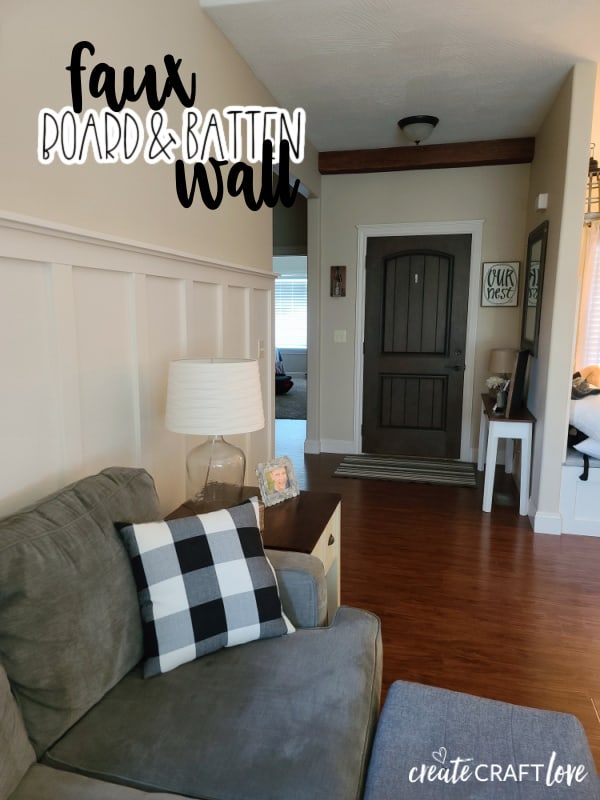
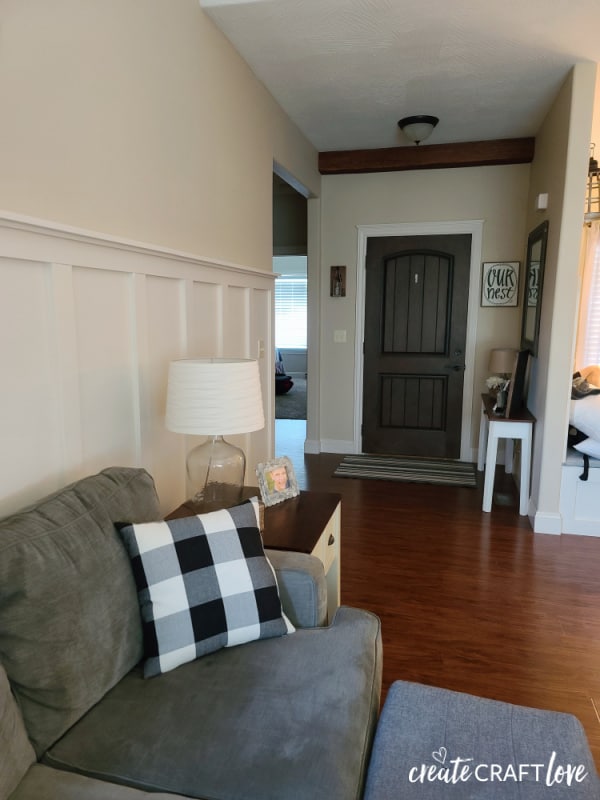
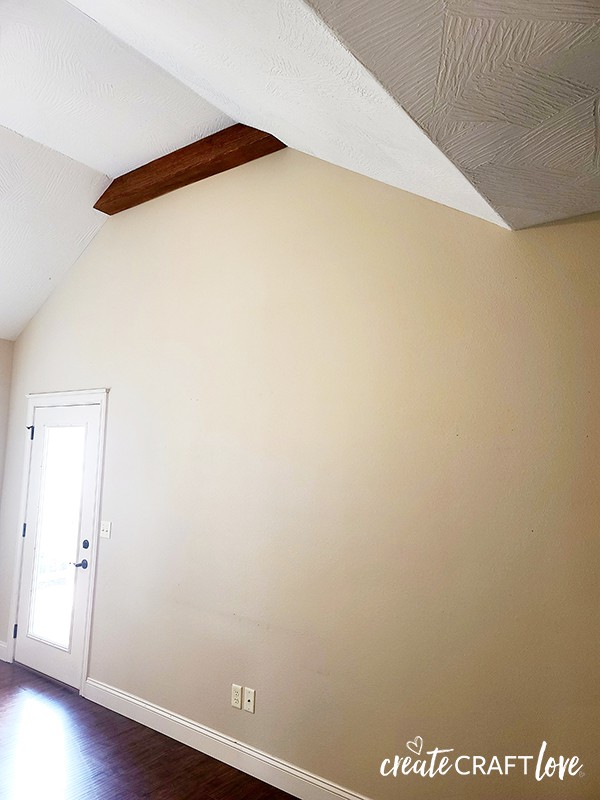
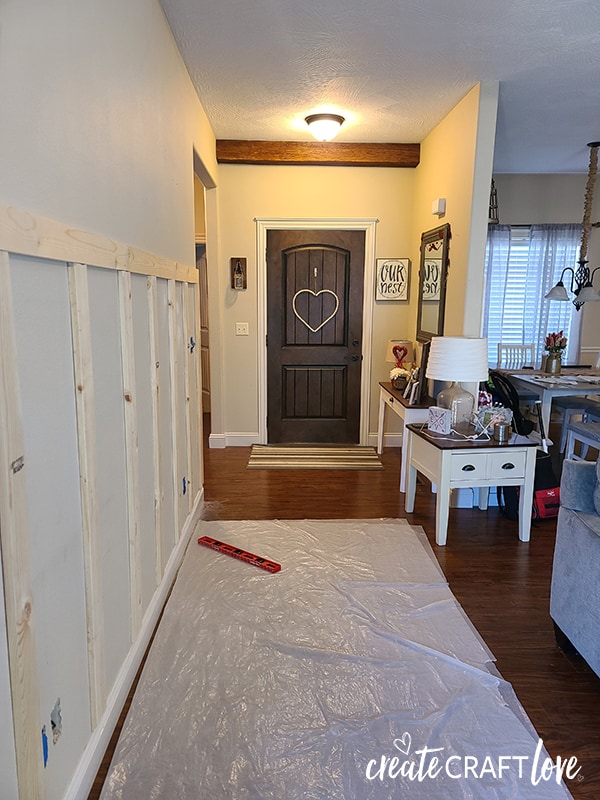
We have a super awkward, large empty wall that has been difficult to decorate since the day we moved in. The vaulted ceiling is centered on that side of the room making it even more difficult to solve.
I thought that if I created a faux board and batten accent wall with a picture ledge, I could easily add to the space and move wall decor without putting a ton of holes in my drywall. When we first moved into our house, my dad and I did a board and batten wall with banquette seating in my dining nook.
The reason this is a Faux Board and Batten Accent Wall is because I didn’t place plywood down over the wall itself. True decorating aficionados will tell you that you can’t add battens to a textured surface but I’m here to tell you it’s not only possible, it really elevates the space. This was an easy weekend project!
This post contains affiliate links for your convenience.
Materials needed to build your Faux Board and Batten Accent Wall:
- 1x4in x 6ft – vertical battens (quantity will depend on your room measurements)
- 1x4in x 8ft – horizontal batten
- 1x3in x 8ft – picture ledge
- 1/2in x 3/4in x 8ft – molding under picture ledge
- Liquid nails
- Ryobi Miter Saw 10 in
- Ryobi One Cordless AirStrike 18 Gauge Brad Nailer
- 1.5 inch brad nails
- Gallon of paint with primer
- Tarp
- Painter’s tape
- Paintable caulk
- Wood putty
- 180 grit sand paper
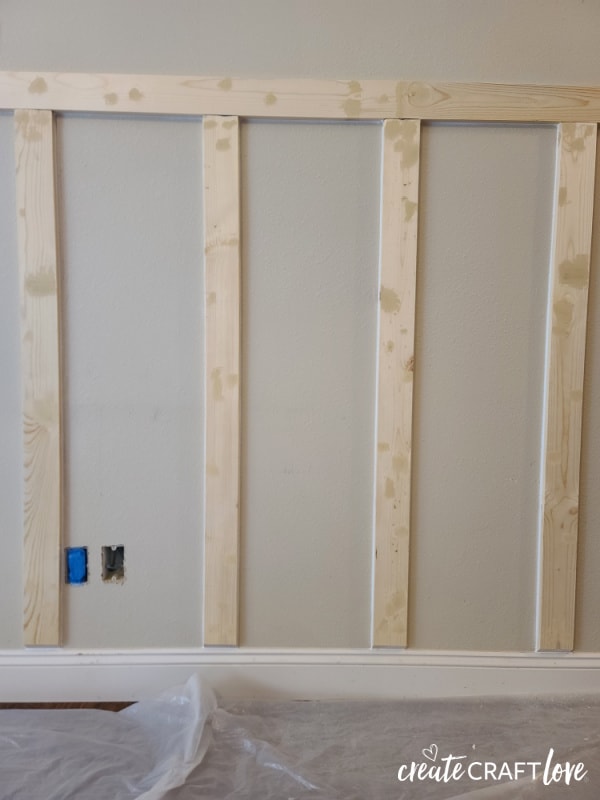
Begin by measuring your wall. Our wall from the door to our deck to the casing to our hallway measured 161 inches. Because you can see the new accent wall from my dining nook where the original wall was done, I wanted to maintain the same height and width of the battens. That vertical height is 57 inches from the top of the baseboard to the top of the horizontal batten. The width of the space between each vertical batten is 13.75 inches. I added the width between battens (13.75in) to the width of 1 batten (3.75in) and divided that by total wall length which gave me 9 battens.
Remove the outlet and light switch covers. Tape over to protect from dust and paint.
My husband and I marked the height on the wall and then marked where each vertical batten would be placed. We started with placing the horizontal battens. Add liquid nails to the back of the horizontal batten, place on wall, level and then adhere the horizontal batten to the wall with the brad nailer.
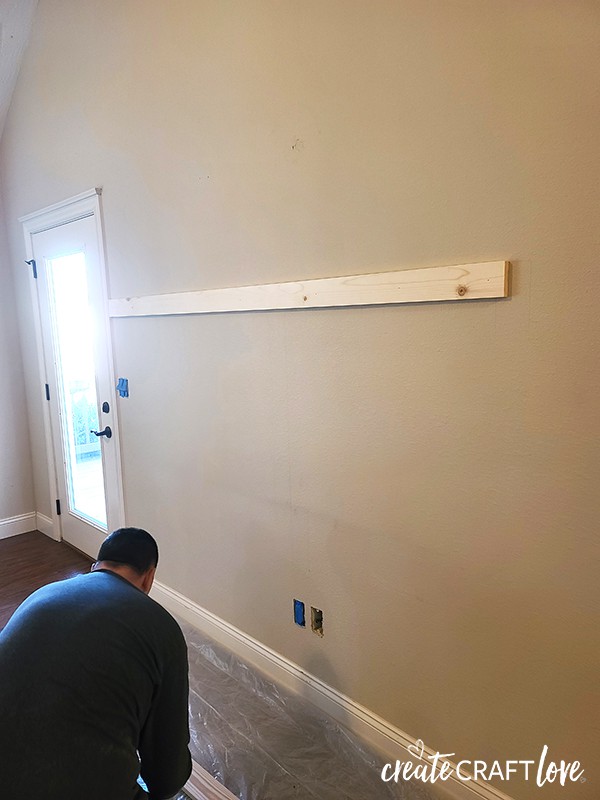
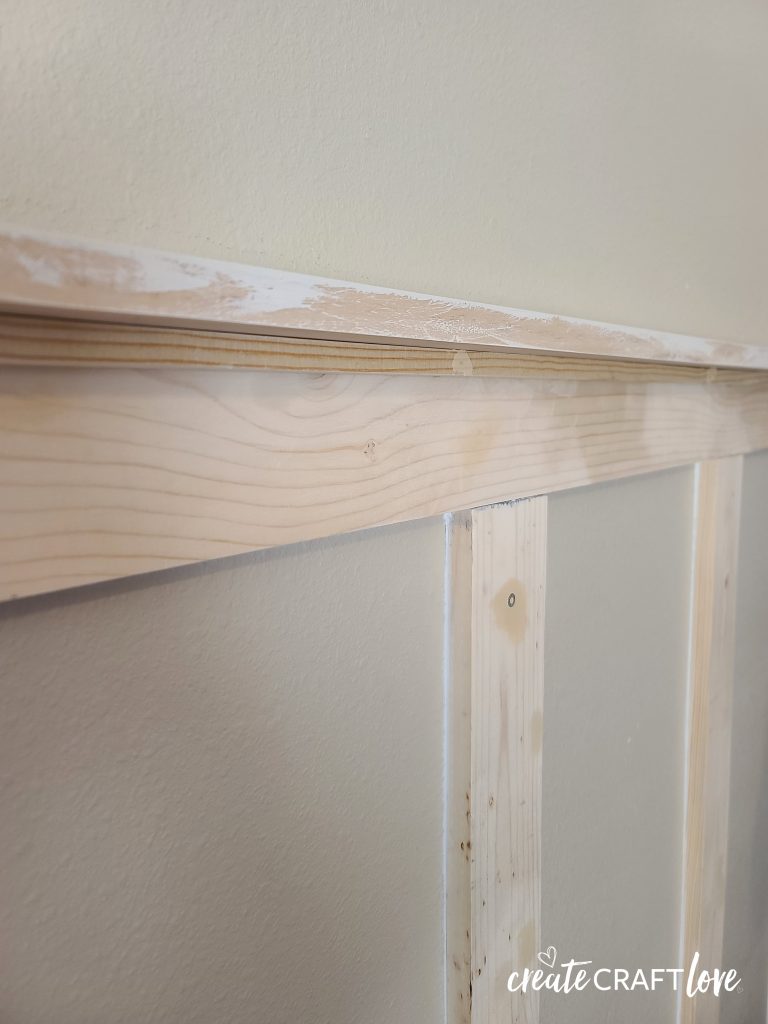
Since I had such a large expanse, I abutted two pieces of wood to create one long horizontal batten. (You can sand and add wood filler later so no one will notice!)
Next we began adding the vertical battens. As anyone who has done home projects in the past is aware, the wall isn’t necessarily straight or level depending on how your house has settled over the years. I recommend measuring each vertical batten and then cutting. Once you get a rhythm down, this process goes quickly.
I didn’t remove the floorboards because I wanted to keep the same ones throughout my house. So we cut a 45 degree angle at the base of each batten where it met the top of the baseboard using my Ryobi miter saw. Follow the same process for adhering the batten to the wall as you did with the horizontal batten.
Continue this process until all of your battens are measured, cut and adhered to the wall.
Wood putty is my favorite part! Apply wood putty to any knots in the wood or nail holes. I also paid close attention to the seam on the horizontal batten where the two pieces of wood joined together. Once painted, you will not be able to tell this wasn’t one long piece of wood! Allow the wood putty to dry and sand smooth. Wipe off any excess sand dust with a clean rag.
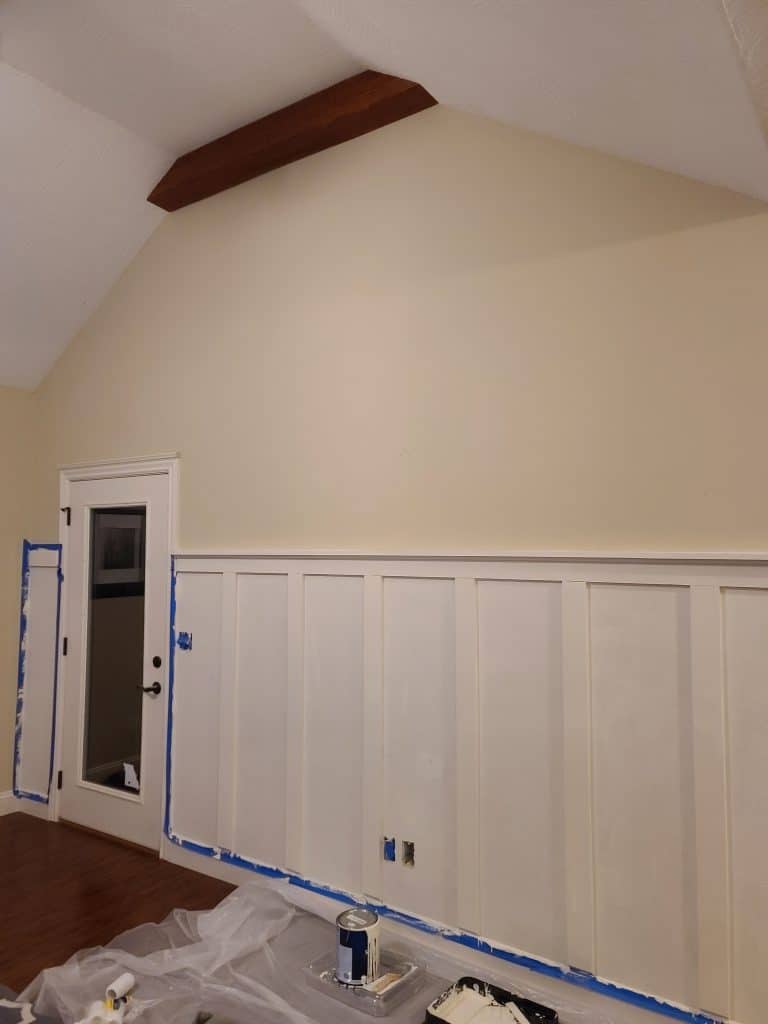
Next, begin caulking between the battens and the wall. This allows for a smooth finish once painted.
Now you will want to measure and cut the two pieces of 1x3inch wood to use as a picture ledge. We nailed the ledge from the top into the edge of the horizontal batten. Then you will add the square molding under the picture ledge for extra support. Measure and cut the square molding and nail into the horizontal batten.
Repeat the caulking and wood putty process on these added pieces.
Finally you will paint out the battens and wall to match your trim (or whatever color you chose). Using the paint with primer, we painted three coats total. Follow directions on the paint regarding dry times.
I am head over heels with how this turned out. My husband was impressed by how much it added to the living room even without being decorated yet!