• Home
  • Crafts
    • Wreaths
    • Back to School Crafts
    • Christmas Crafts
    • Father’s Day Crafts
    • Fourth of July Crafts
    • Halloween Crafts
    • Kid’s Projects
    • Mother’s Day Crafts
    • Thanksgiving Crafts
    • Valentine’s Day Crafts
  • Recipes
    • Christmas Recipes
    • Fourth of July Recipes
    • Halloween Recipes
    • Thanksgiving Recipes
    • Appetizers
    • Beverages
    • Breakfast
    • Dessert
    • Main Dish
    • Side Dish
    • Soups & Salads
    • Snacks
  • Freebies
    • Back to School Printables
    • Christmas Printables
    • Father’s Day Printables
    • Fourth of July Printables
    • Halloween Printables
    • Mother’s Day Printables
    • Thanksgiving Printables
    • Valentine’s Day Printables
  • xTool
  • About
    • About CCL
    • Privacy Policy
    • Disclosure
    • Contact Us
    • Email
    • Facebook
    • Instagram
    • Pinterest
    • RSS
    • Twitter

Create Craft Love

July 9, 2013 ·

Summer Star Glasses

Fourth of July· Fourth of July Crafts· Holidays

  • Facebook
  • Twitter

This post may contain affiliate links. See my disclosure policy for more details.

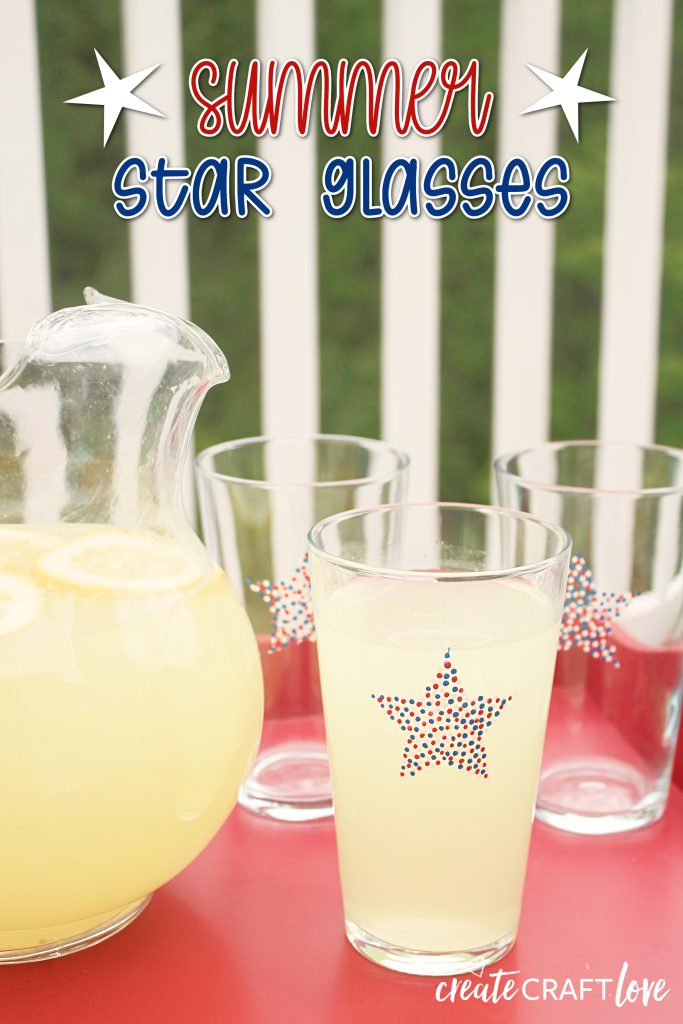
These Summer Star Glasses are the perfect addition to YOUR summer cookout!

Do you remember using the pointillism technique in art class?  It was one of my favorite projects!  As a matter of fact, we started using pointillism when coloring in our coloring books.  

This post contains affiliate links for your convenience.

Wanna make your own Summer Star Glasses?

  • Glass paint markers
  • Glass tumblers
  • Adhesive vinyl
  • Oven

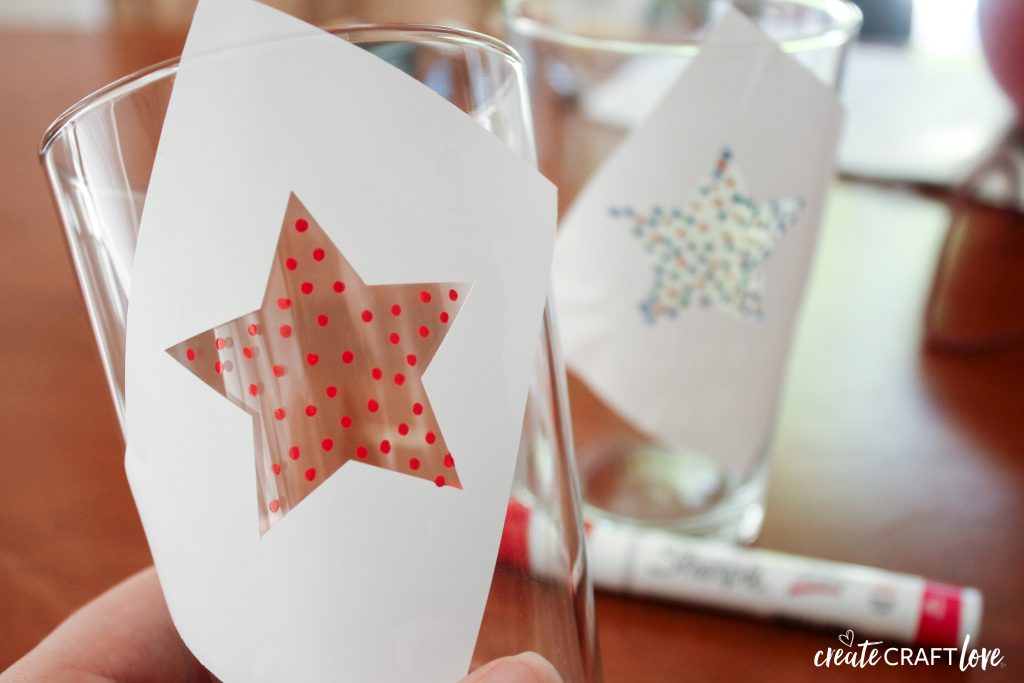
These are super easy to make!  First, create a star stencil with your adhesive vinyl.  {You do NOT need a die cutting machine to do this!  But I’m lazy and used mine.  hee hee}  Apply your vinyl to the glass tumbler.  The point of the star should be about 3/4 inches from the top edge of the glass.

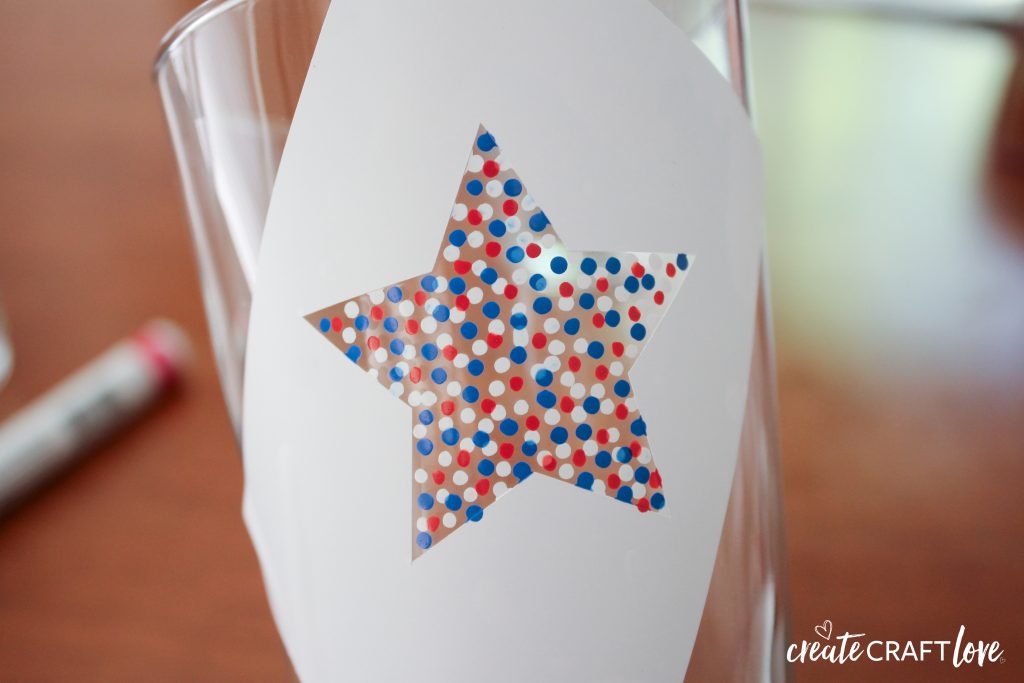
Using your glass paint markers, begin making dots inside the star.

Keep applying until all of the colors have been used and the star is filled.

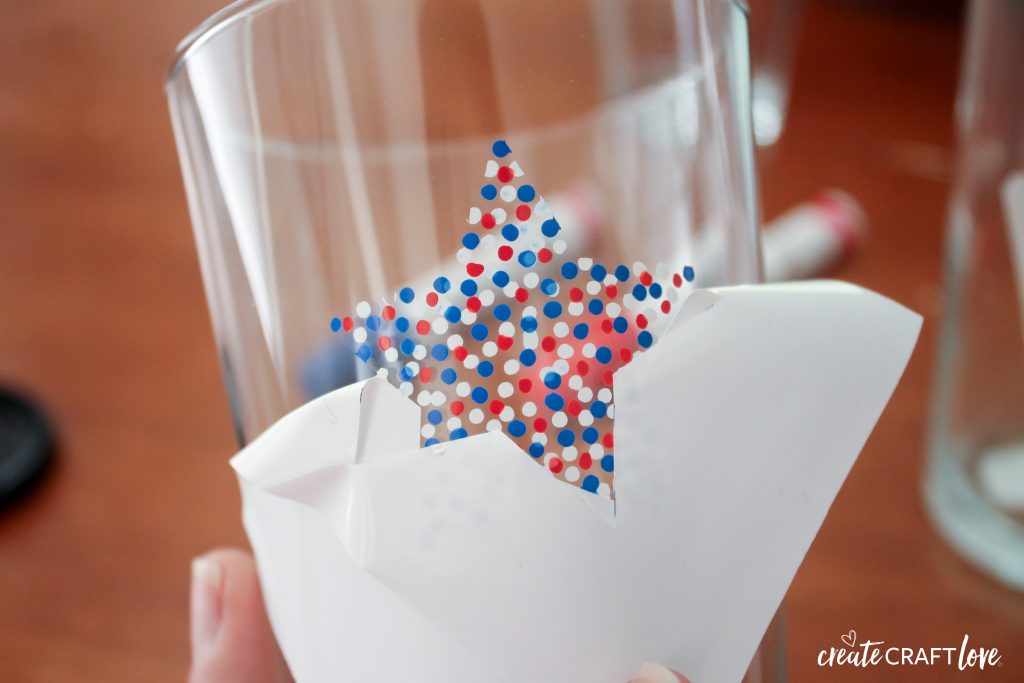
Allow about 30 minutes for the glass paint to dry.

Remove the vinyl stencil.

To cure the glasses, place them in a cold oven.  Turn on the oven and bake at 325 degrees for 45 minutes.  When time is up, turn off the oven and leave the door ajar while the glasses cool.  That should make them safe to wash!

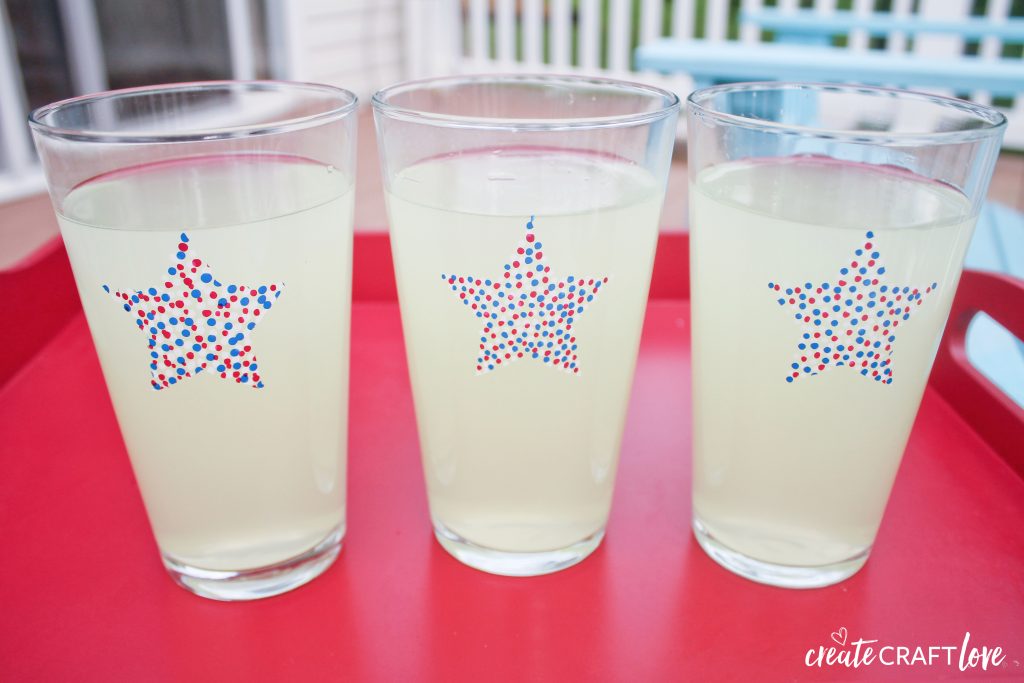
I am swooning over these glasses!  I cannot wait to use them at our next summer cookout!


About Us

We are passionate about sharing simple, fun DIY projects that anyone can tackle—whether you're a seasoned crafter or just getting started. From seasonal décor to everyday crafts, we love inspiring others to make something beautiful with their own two hands.

« Chalkboard Labeled Beverage Dispenser
DIY Ice Cream Parlor Set »

Trackbacks

  1. The Creative Connection #2 - Create Craft Love says:
    July 11, 2013 at

    […] Summer Star Glasses by Create.Craft.Love […]

    Reply
  2. {The Creative Connection 2} - Wait Til Your Father Gets Home says:
    July 11, 2013 at

    […] Summer Star Glasses by Create.Craft.Love […]

    Reply
  3. The Creative Connection - 07/11 - Becoming Martha says:
    July 11, 2013 at

    […] Summer Star Glasses by Create.Craft.Love […]

    Reply

Popular Posts

Winter Decorations for After Christmas
This Gold Leaf Mason Jar Vase is keeping with the trends this spring! #spring #gold #goldleaf #masonjars

HALLOWEEN

THANKSGIVING

You will love how pretty these Gold Leaf Stenciled Pumpkins look!! via createcraftlove.com

CHRISTMAS

Gift Guide for the Sports Fanatic for less than $10! via createcraftlove.com
© 2019 · Create Craft Love·
  • Pinterest
  • Facebook
  • Twitter