This post may contain affiliate links. See my disclosure policy for more details.
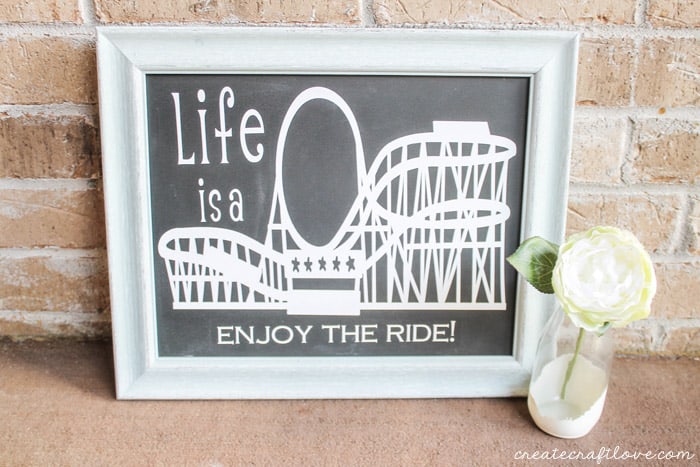
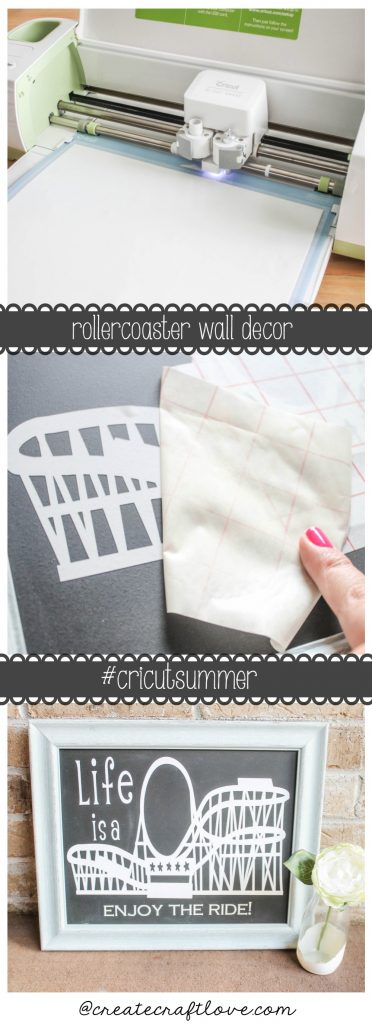
Summer is the perfect opportunity to get out and make some memories. What’s on your summer bucket list? Are you going on an adventure? Every year we head to Six Flags St. Louis for a day of amusement park fun. I don’t know about you but rollercoasters scare the crap out of me. So when your husband points out that your six year old survived the thrill ride, you are kind of obligated to “woman up”. But it got me thinking, life really IS a rollercoaster. This Rollercoaster Wall Decor made for #CricutSummer is my inspiration to slow down and enjoy the ride!
This post contains affiliate links for your convenience.
MATERIALS NEEDED TO MAKE THIS ROLLERCOASTER WALL DECOR
- Cricut Explore One
- Cricut Tools Basic Set
- Cricut 12×24 inch cutting mat
- Cricut Vinyl in white
- Cricut Transfer Tape
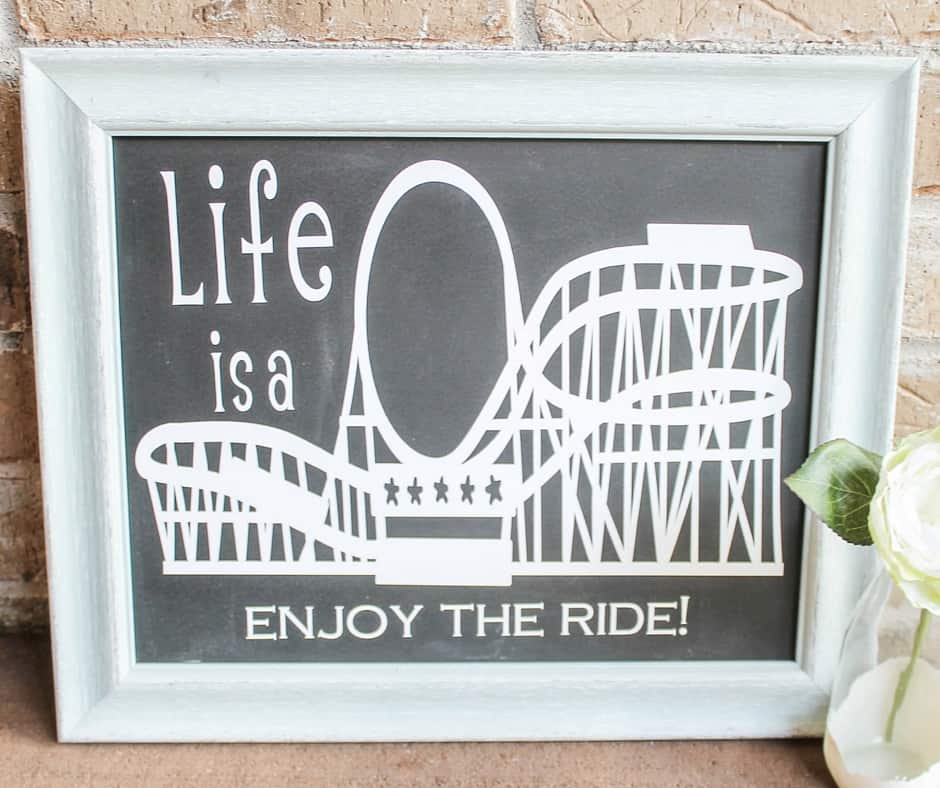
- 11×14 Chalkboard
CRICUT IMAGES USED
- Rollercoaster #M42236 from the Summer Vacation cartridge
- Alphalicious font
- Copperplate Gothic Light font (not a Cricut font)
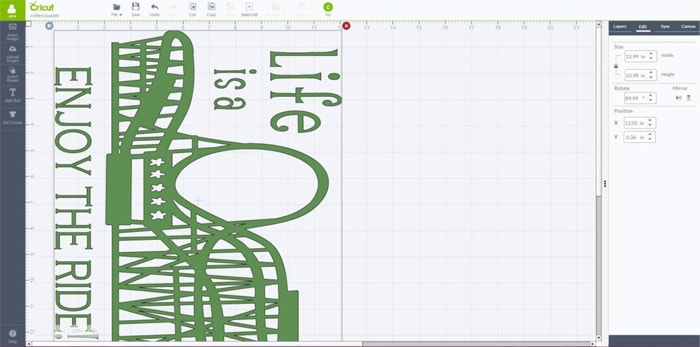
Open Cricut Design Space. Choose the rollercoaster image as stated above. Size the rollercoaster to 9.5 inches by 12.5 inches. Before you cut, add the wording. I used alphalicious font for “Life is a”. Arrange the words to the left of the rollercoaster image. Under the rollercoaster, add “enjoy the ride” using the copperplate gothic light font. (This font is found on most Windows computers.) Once you have everything arranged as you like it, click “select all” and weld the fonts and image together. Rotate the image 90 degrees. Resize the full image to 13 inches width x 11 inches height. Use image below as your guide for the dimensions.
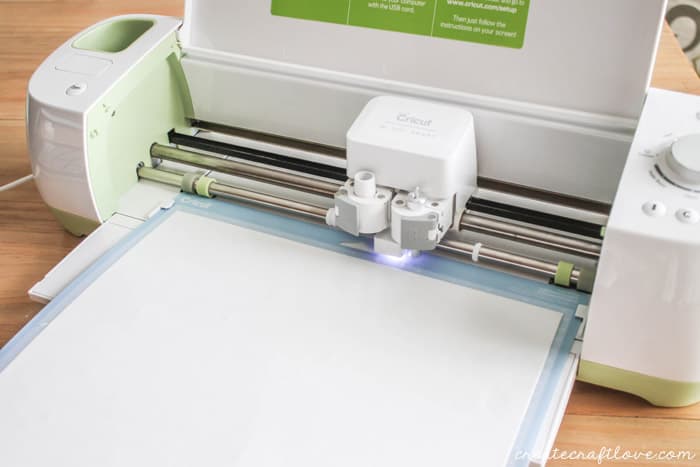
Next, click go. Be sure your knob is set to vinyl.

Follow the screen prompts and begin to cut.
Once the image is finished cutting, remove from the machine. You will need to begin weeding any excess vinyl using the weeding tool from the tools set.
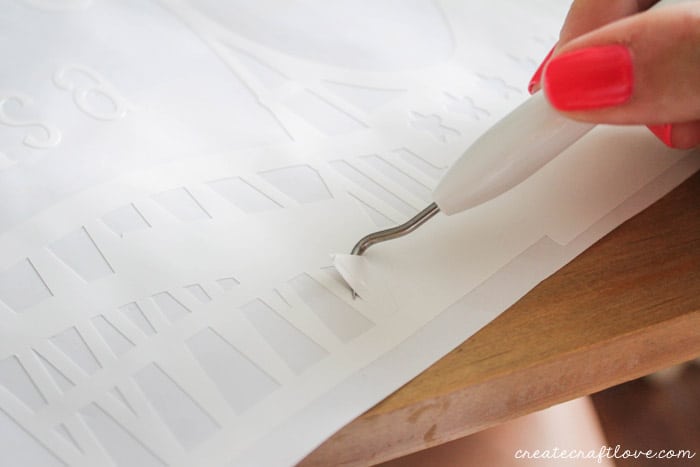
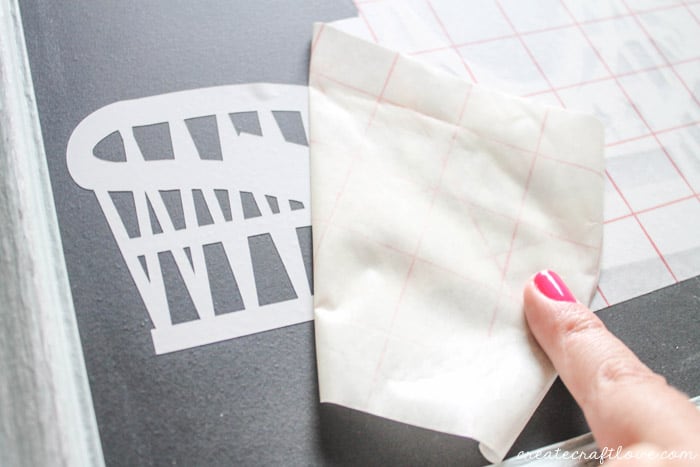
After all of the negative space has been removed, cut the wording off the image. That way I can rearrange the placement and not have to work with so much vinyl while transferring. Place the transfer tape over the image. Use the scraper tool to secure the vinyl to the transfer tape.
Place the transfer tape with vinyl attached onto the chalkboard. Use the scraper tool to adhere the vinyl to the chalkboard.

I find it easiest to begin peeling the transfer tape at an angle. Slowly and carefully remove the transfer tape.
Repeat the transfer process with the wording.
It turned out better than I imagined. And you know what, maybe this year I will jump on the rollercoaster with my son and enjoy the ride!
I’d LOVE for you to pin this image!
Share this image on Facebook!
Click HERE to see more amazing Cricut Projects!
